BitBucket
In this tutorial, you’ll learn how to:
- Integrate NightVision DAST into your CI/CD pipelines to find exploitable vulnerabilities automatically within minutes.
- Use NightVision’s API Extraction to scan the source code to find the attack vector in the file and line of code.
Preview: Example Results
Section titled “Preview: Example Results”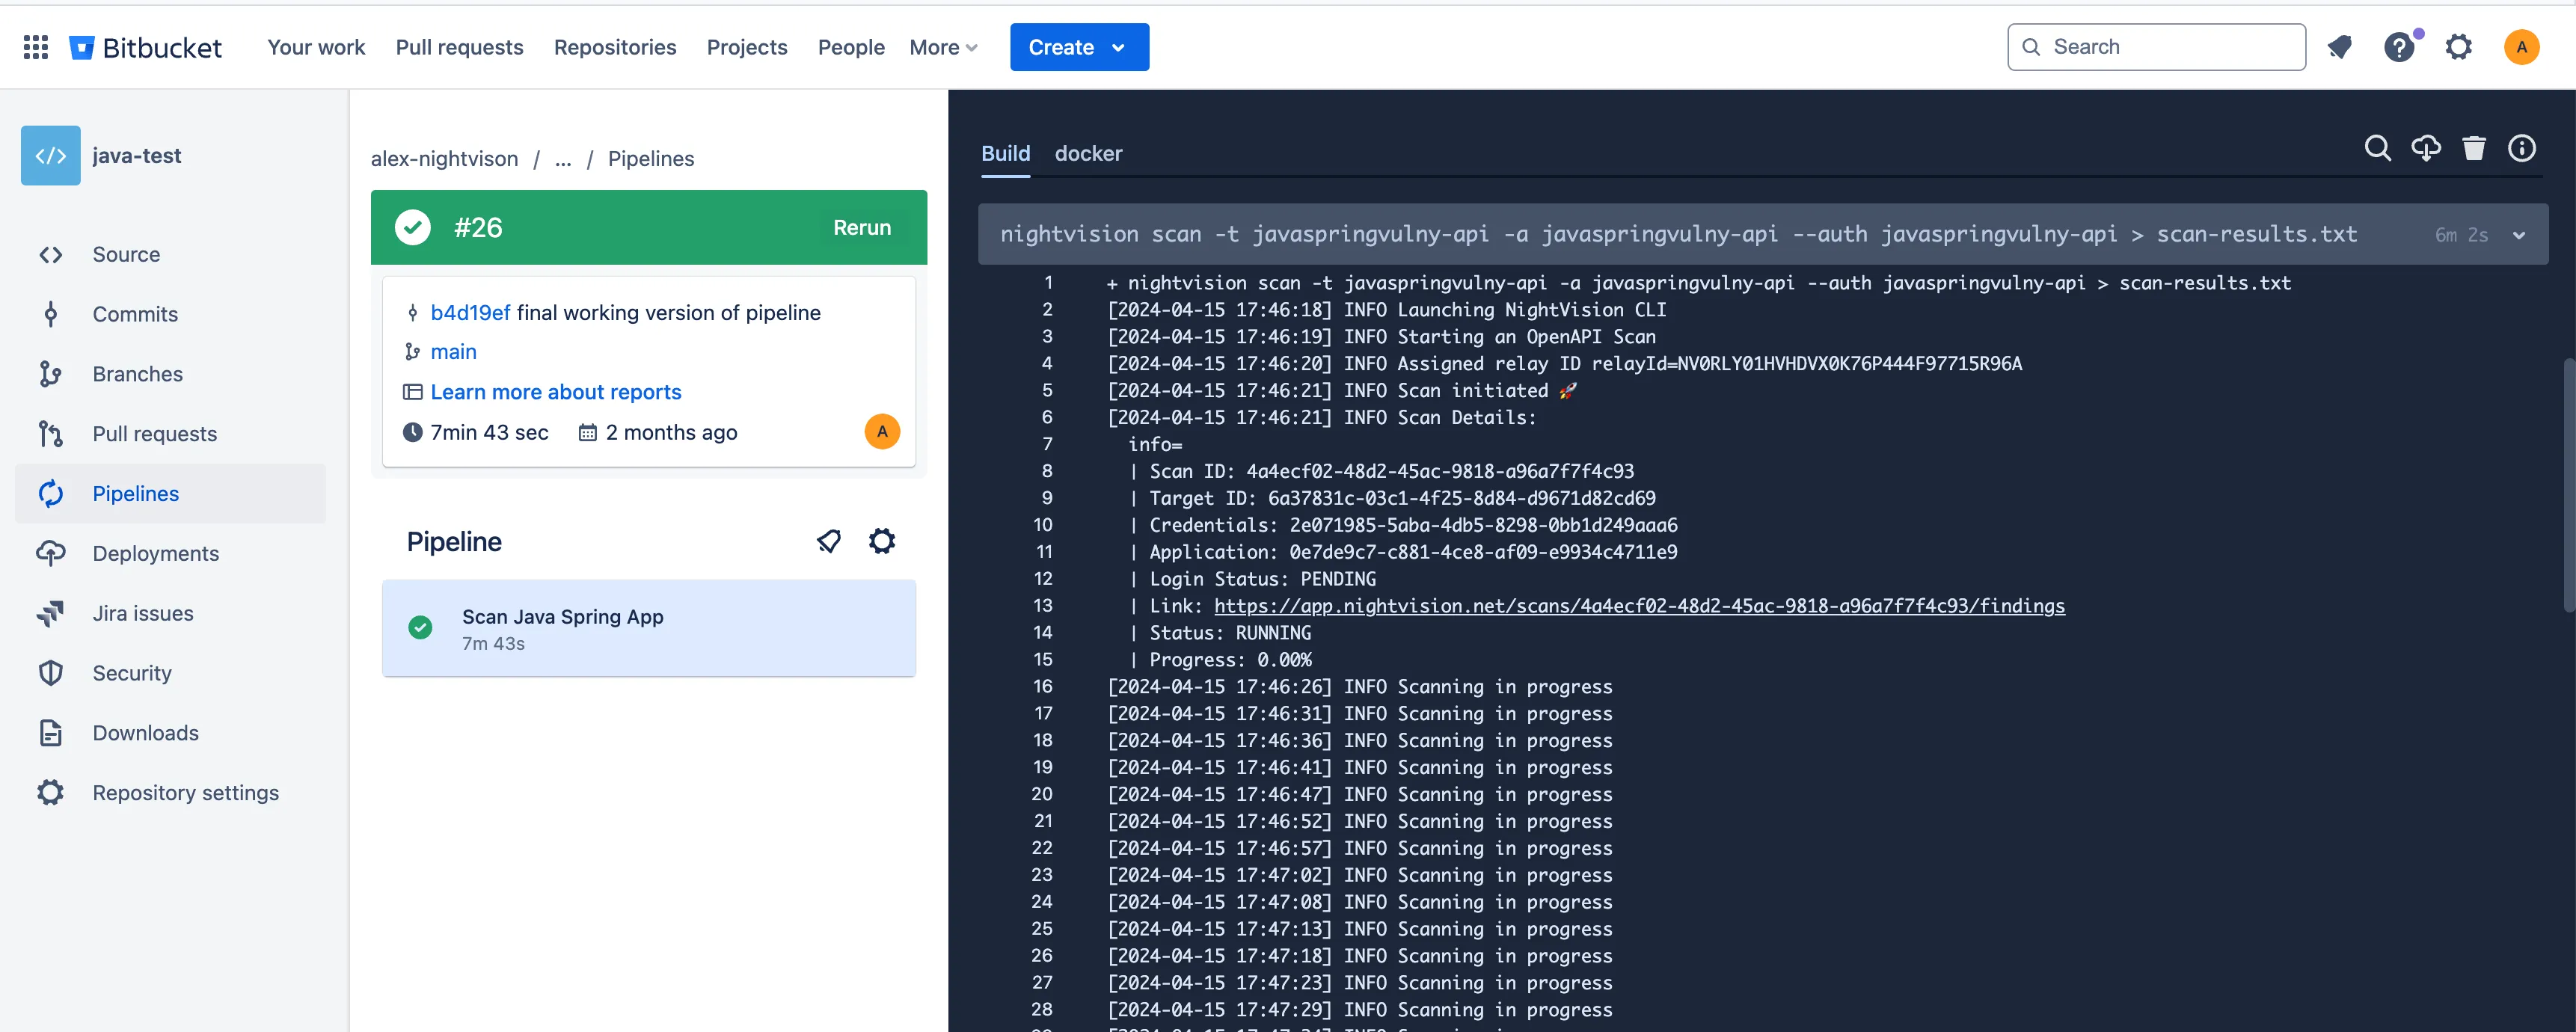
Prerequisites
Section titled “Prerequisites”- To run NightVision scans from BitBucket, you must set the
NIGHTVISION_TOKENenvironment variable. You can create the API key by following the instructions here: Generate API Tokens. - After creating the token, you can store it in the UI for your Pipeline via Repository Settings-> Repository Variables.
You must also specify the Target and Authentication credentials (if applicable) for the NightVision CLI.
- As covered in previous pages, you can create those prerequisite resources for this example app by running the following commands from your terminal:
# clone the example codegit clone https://github.com/nvsecurity/java-github-actions-demo.gitcd java-github-actions-demo# Start the example appdocker compose up -d
# Create the nightvision resourcesnightvision target create javaspringvulny-api https://localhost:9000 --type apiecho "Enter the following credentials:"echo "username: user"echo "password: password"nightvision auth playwright javaspringvulny-api create https://localhost:9000
Private CI/CD
Section titled “Private CI/CD”NightVision CI/CD has advanced features beyond scanning your public staging apps. With NightVision, you can deploy a copy of your app inside the pipeline. This allows our API discovery tool to automatically create new OpenAPI documentation before running a full DAST scan, giving you far greater coverage at the push of a button!
Example Repository
Section titled “Example Repository”- After you are signed into BitBucket, fork the example repository: BitBucket Integration Repo
Example Workflow File:
Section titled “Example Workflow File:”image: docker:stable
# # SETUP STEPS# nightvision target create javaspringvulny-api https://localhost:9000 --type api# nightvision swagger extract . -t javaspringvulny-api --lang java# nightvision auth playwright create https://localhost:9000 javaspringvulny-api
pipelines: default: - step: name: Scan Java Spring App services: - docker script: - apk add --no-cache docker-compose curl tar - curl -L https://downloads.nightvision.net/binaries/latest/nightvision_latest_linux_amd64.tar.gz -q | tar -xz && mv nightvision /usr/local/bin/ # swap to nightvision container for SAST steps - docker run -v $(pwd):/mnt --env "NIGHTVISION_TOKEN=$NIGHTVISION_TOKEN" alexnightvision/nightvision-cli nightvision swagger extract . -t javaspringvulny-api --lang java # Wait for containers to fully start - docker-compose up -d - sleep 10 # use host pipeline container for everything else to avoid timeouts - nightvision scan javaspringvulny-api --auth javaspringvulny-api > scan-results.txt - nightvision export sarif -s "$(head -n 1 scan-results.txt)" --swagger-file openapi-spec.yml max-time: 30 # Time in minutesPublic CI/CD
Section titled “Public CI/CD”-
Once you run your first Public Web App Scan or Public API Scan this will create the
Targetobjects needed for scanning. -
Create a NIGHTVISION_TOKEN secret by clicking the
Generate API tokenbutton under your profile. -
Add a
bitbucket-pipelines.ymlpipeline file to any BitBucket repository.
image: docker:stable
pipelines:  default:    - step:        name: Scan Java Spring App        services:          - docker        script:          - apk add --no-cache docker-compose curl tar          - curl -L https://downloads.nightvision.net/binaries/latest/nightvision_latest_linux_amd64.tar.gz -q | tar -xz && mv nightvision /usr/local/bin/          - nightvision scan temp-fe        max-time: 30 # Time in minutes