Public REST APIs
Description
Section titled “Description”Historically, skilled engineers have needed hours or days to prepare and run task scans. However, with NightVision, any developer can easily start a scan from scratch in under 30 seconds and obtain results in under 15 minutes.
Interactive Guide
Section titled “Interactive Guide”Step-by-Step Guide
Section titled “Step-by-Step Guide”To run a security scan against a REST API:
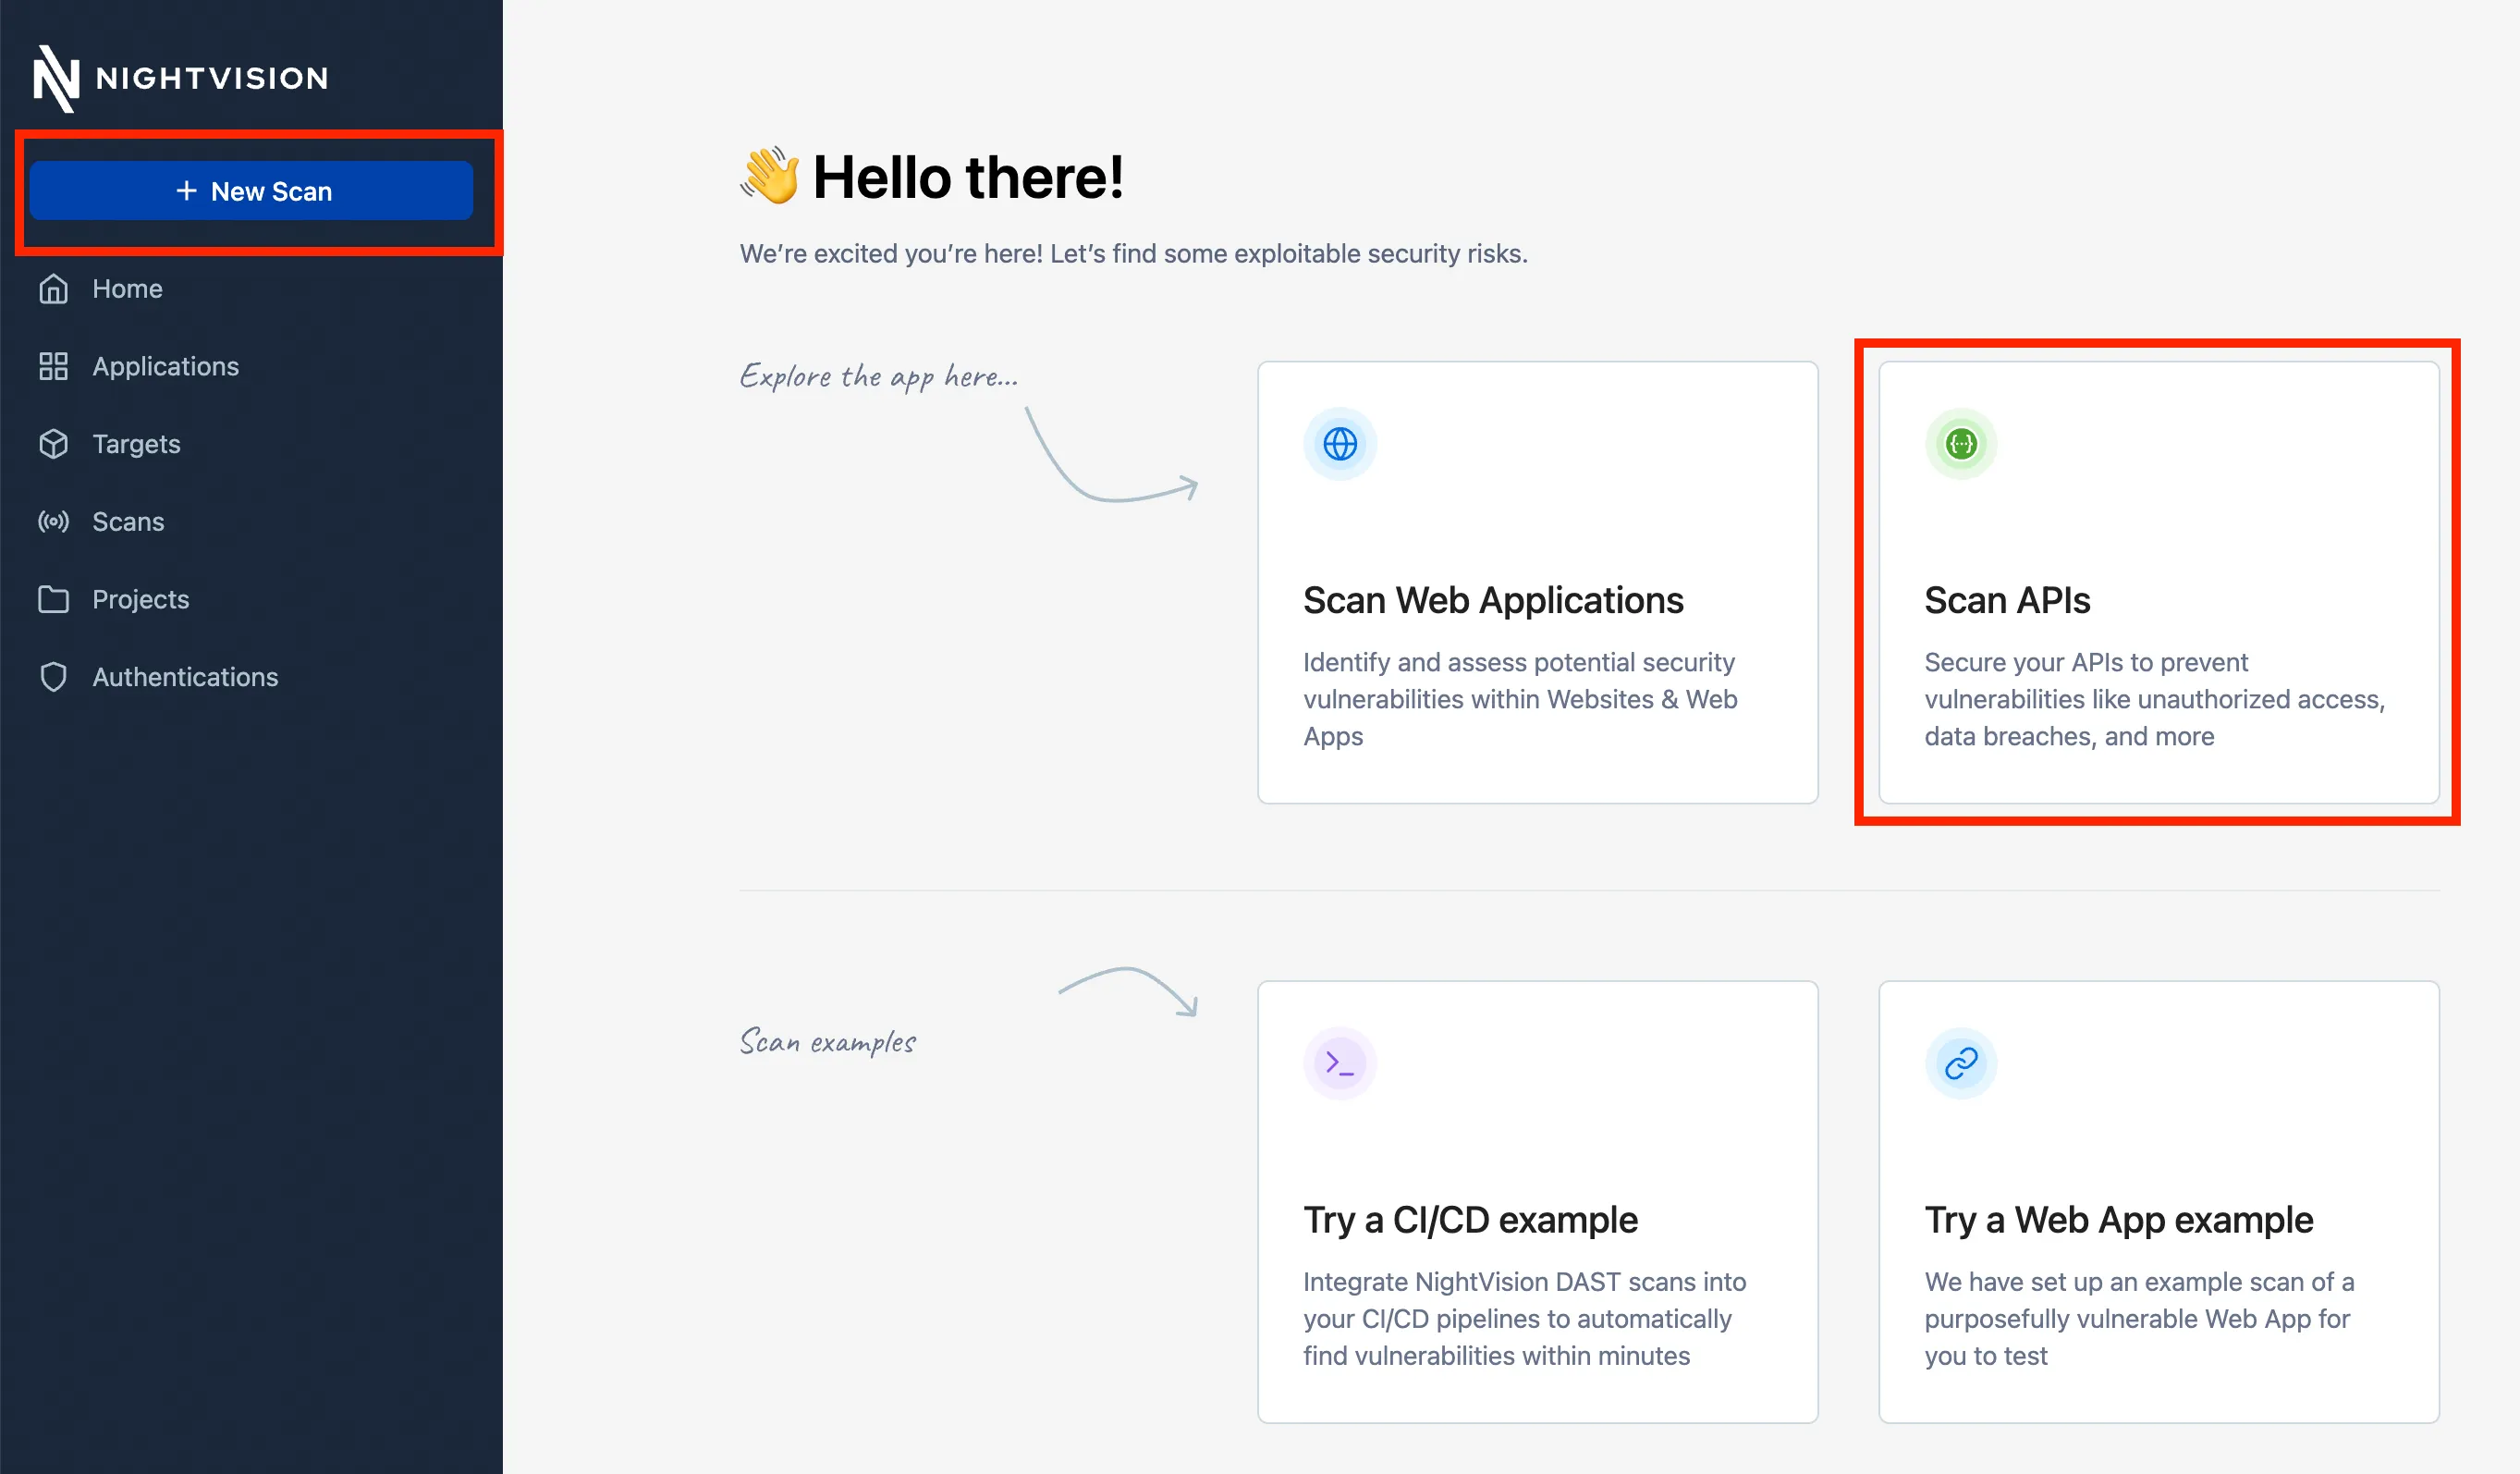
- Navigate to https://app.nightvision.net.
- Click on New Scan in the top left.
- Click on Scan APIs
- Supply a Target Name and a Base URL with the URL of the API you want to scan. For example:
- Target Name:
nv-firing-range - Base URL: https://javaspringvulny.nvtest.io:9000/
- Target Name:
- If your OpenAPI spec is saved on your computer, you can upload it by clicking on:
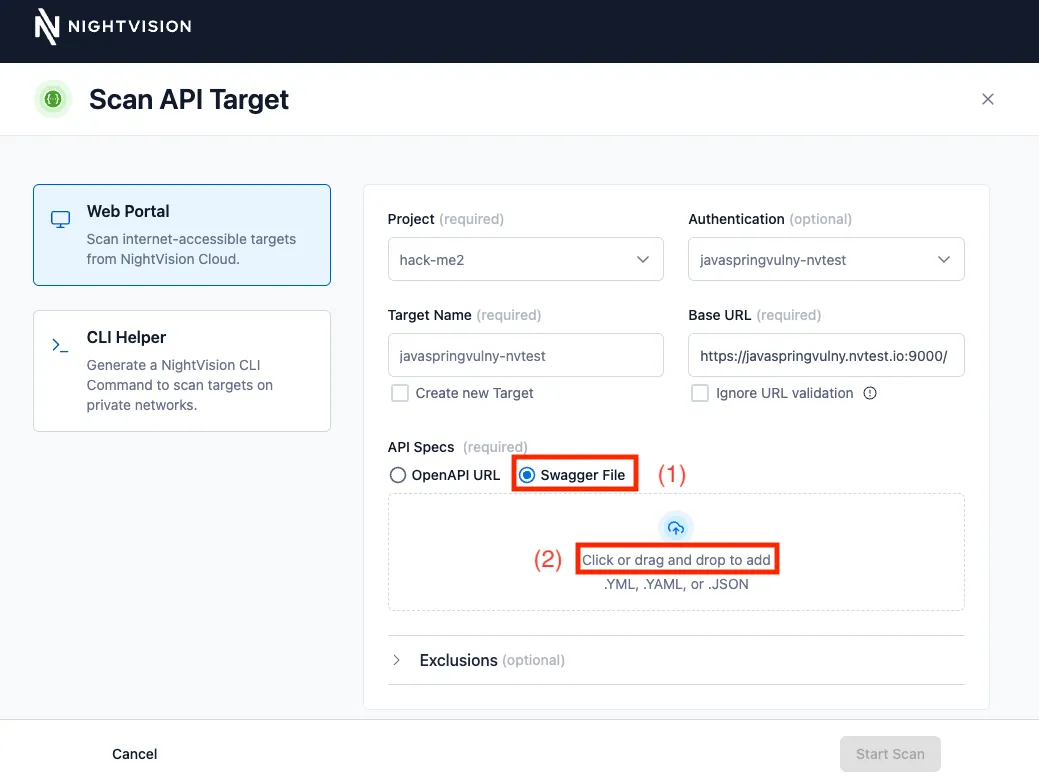
- Alternatively, if your OpenAPI file is accessible from a public web page like this one, you can specify the Swagger file URL.
- For this example, you can supply this URL: https://javaspringvulnyopenapispec.fra1.cdn.digitaloceanspaces.com/openapi-spec.json
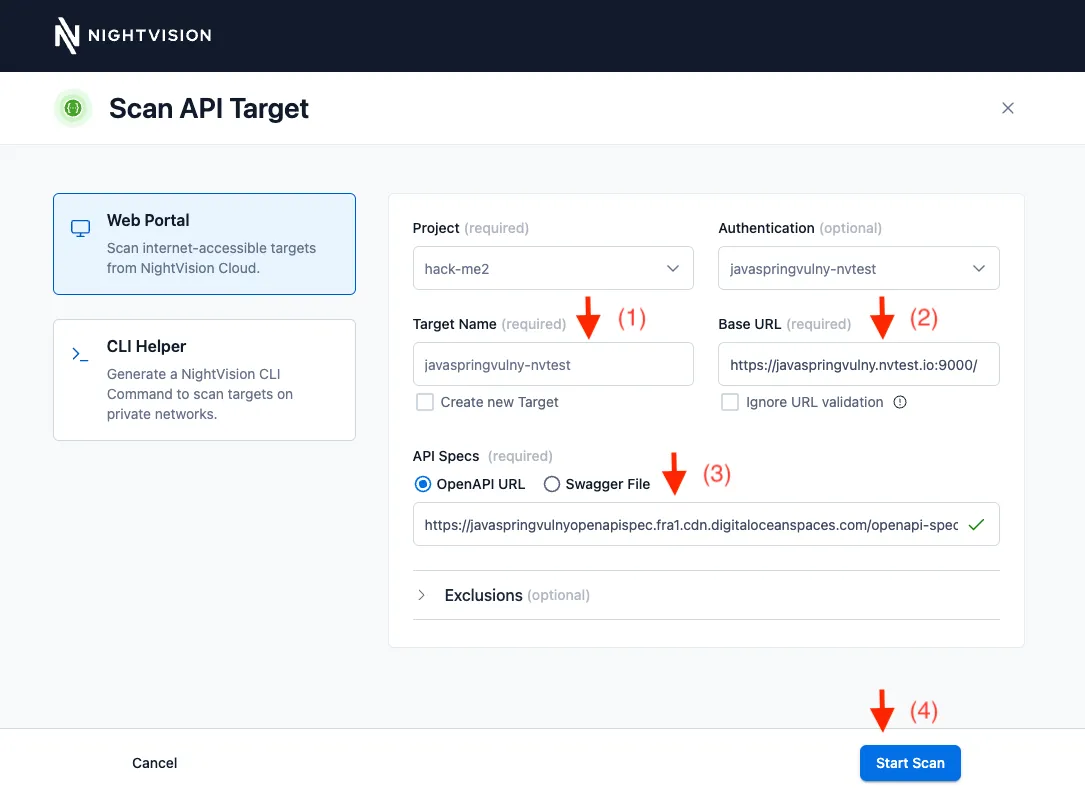
- Click Start Scan. This will initiate a scan on the REST API.
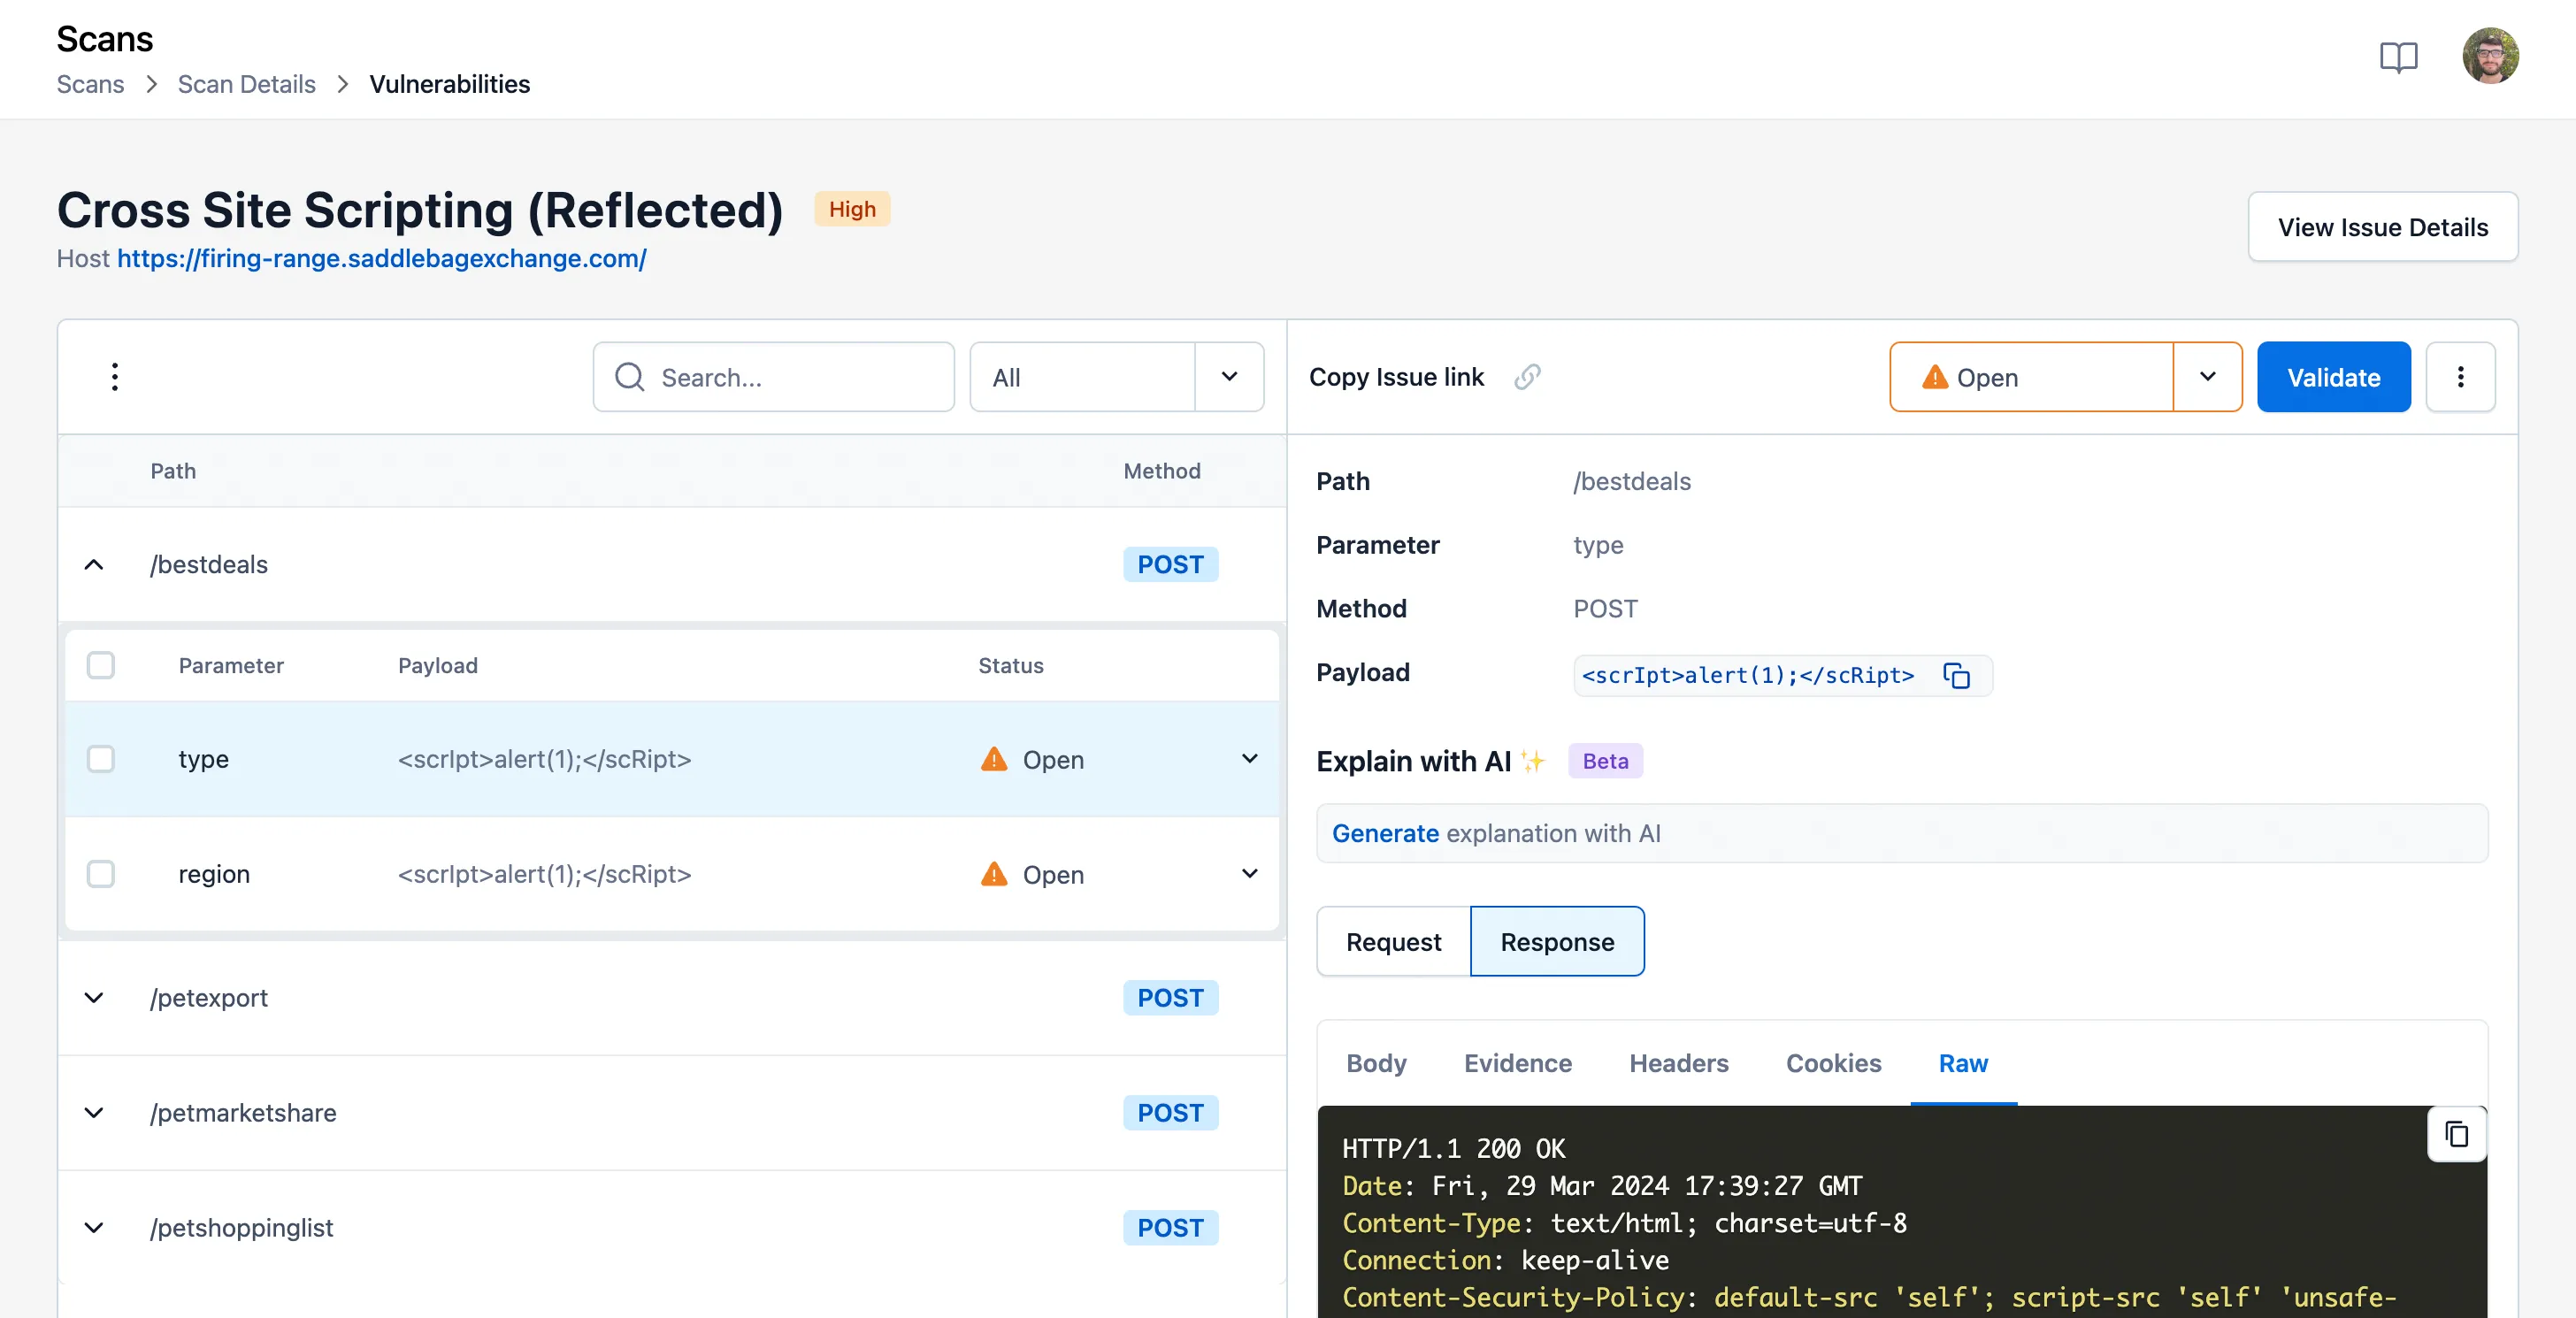
- You can see the results on the Scans page, just like we covered in Public Web Apps.
Note: Here are the references for the URL and OpenAPI Spec files used in this tutorial.
- Base Target URL: https://javaspringvulny.nvtest.io:9000/
- OpenAPI file location: https://javaspringvulnyopenapispec.fra1.cdn.digitaloceanspaces.com/openapi-spec.json (download this file)