GitLab
Note: This is a similar tutorial explored in our GitHub actions tutorial, but geared towards using GitLab CI/CD and GitLab Security Alerts.
In this tutorial, you’ll learn how to:
- Integrate NightVision DAST scans into your CI/CD pipelines to automatically find exploitable vulnerabilities within minutes.
- Use NightVision’s API Extraction to scan the source code to find the attack vector in the file and down to the line of code.
- Upload any vulnerabilities discovered with NightVision to GitLab’s vulnerability report.
CI file
Section titled “CI file”To run a NightVision scan from GitLab, you must set the NIGHTVISION_TOKEN environment variable in your CI/CD settings for your repository. You can do this through the UI for your repository via this documentation.
An example file is below:
stages:  - extract  - scan
variables:  NIGHTVISION_TARGET: javaspringvulny-api-gitlab  NIGHTVISION_APP: javaspringvulny-api-gitlab  NIGHTVISION_AUTH: javaspringvulny-api-gitlab  # Secure docker-in-docker: TLS on 2376 with generated client certs, not the  # unauthenticated tcp://docker:2375 socket.  DOCKER_HOST: tcp://docker:2376  DOCKER_TLS_CERTDIR: "/certs"  DOCKER_TLS_VERIFY: "1"  DOCKER_CERT_PATH: "/certs/client"  DOCKER_DRIVER: overlay2  FF_NETWORK_PER_BUILD: "true"   # container-to-container networking for the scan
# Run the full DAST scan only on the default branch or a manual ("Run pipeline")# trigger, so routine feature pushes do not each launch a scan.workflow:  rules:    - if: $CI_COMMIT_BRANCH == $CI_DEFAULT_BRANCH    - if: $CI_PIPELINE_SOURCE == "web"
extract_spec:  stage: extract  image: ubuntu:24.04  before_script:    - apt-get update && apt-get install -y wget ca-certificates    - wget -c https://downloads.nightvision.net/binaries/latest/nightvision_latest_linux_amd64.tar.gz -O - | tar -xz    - mv nightvision /usr/local/bin/  script:    # Extract the OpenAPI spec from the source. On failure, fall back to the    # committed backup spec but log loudly so a real failure is visible.    - |      if nightvision swagger extract ./ --lang spring -t "${NIGHTVISION_APP}"; then        echo "Spec extracted from source."      else        echo "WARNING: 'nightvision swagger extract' failed; using committed backup-openapi-spec.yml." >&2        cp backup-openapi-spec.yml openapi-spec.yml      fi      # Guard on the artifact as well: a zero exit that wrote no spec (e.g. no      # routes extracted) still falls back to the committed backup.      [ -s openapi-spec.yml ] || cp backup-openapi-spec.yml openapi-spec.yml  artifacts:    paths:      - openapi-spec.yml    expire_in: 30 days
dast_scan: stage: scan image: ubuntu:24.04 services: - docker:dind before_script: - apt-get update && apt-get install -y wget ca-certificates docker.io docker-compose-v2 - wget -c https://downloads.nightvision.net/binaries/latest/nightvision_latest_linux_amd64.tar.gz -O - | tar -xz - mv nightvision /usr/local/bin/ script: # Start the target application. - docker compose up -d - sleep 15 # Run the scan and capture its id robustly: extract the scan UUID from the # output and fail loudly if none is produced. - nightvision scan "${NIGHTVISION_TARGET}" --auth "${NIGHTVISION_AUTH}" | tee scan-results.txt - SCAN_ID=$(grep -oiE '[0-9a-f]{8}(-[0-9a-f]{4}){3}-[0-9a-f]{12}' scan-results.txt | head -n1) - 'test -n "${SCAN_ID}" || { echo "ERROR no scan id found in scan output" >&2; exit 1; }' # Native GitLab DAST report (no external converter). - nightvision export gitlab -s "${SCAN_ID}" --swagger-file openapi-spec.yml -o gl-dast-report.json after_script: - for pod in $(docker ps -q); do docker logs "$pod" >> test.pod.logs 2>&1 || true; done artifacts: reports: dast: gl-dast-report.json paths: - gl-dast-report.json - test.pod.logs expire_in: 30 days dependencies: - extract_specPreview: Vulnerability Report
Section titled “Preview: Vulnerability Report”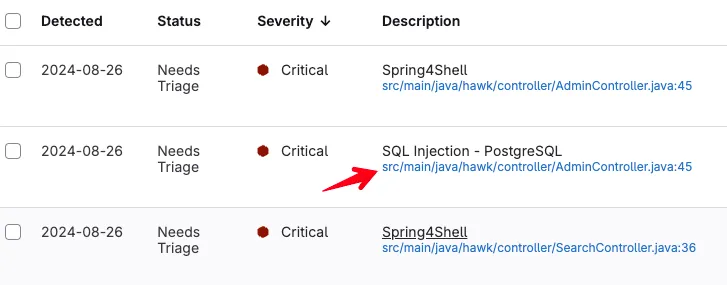
Prerequisites
Section titled “Prerequisites”Let’s install GitLab’s CLI to make things easier. Per the GitLab CLI docs, Homebrew is the officially supported installation method for macOS, Linux, and Windows (via WSL). Run this command to install GitLab and authenticate.
brew install glabglab auth loginBefore we get started, you’ll need to mirror the example repository to GitLab.
Easy Mode
Section titled “Easy Mode”Open your terminal and run this command:
curl -O https://raw.githubusercontent.com/nvsecurity/nv-public-reference/main/demo-scripts/gitlab-demo.sh && \  chmod +x gitlab-demo.sh
# Set GROUP to the GitLab group that has a GitLab ultimate plan (or trial)# Set REPO to the name of the repository you want to create.export GROUP=GroupOrProjectexport REPO=myRepo
./gitlab-demo.sh $GROUP $REPO
Now open your GitLab repository in the browser.
The scan will be complete in about 6-7 minutes.
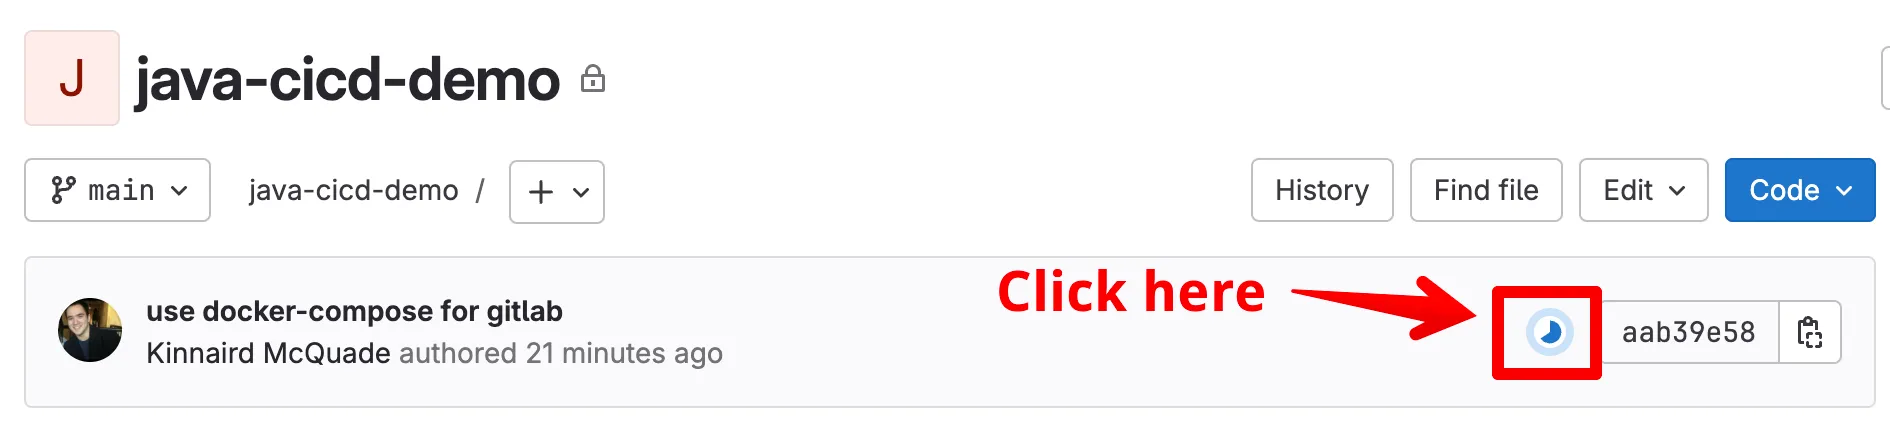
- Optionally, you can click on the GitLab Pipeline execution to watch it run, as indicated here:
- When the scan finishes, click on the Security tab.
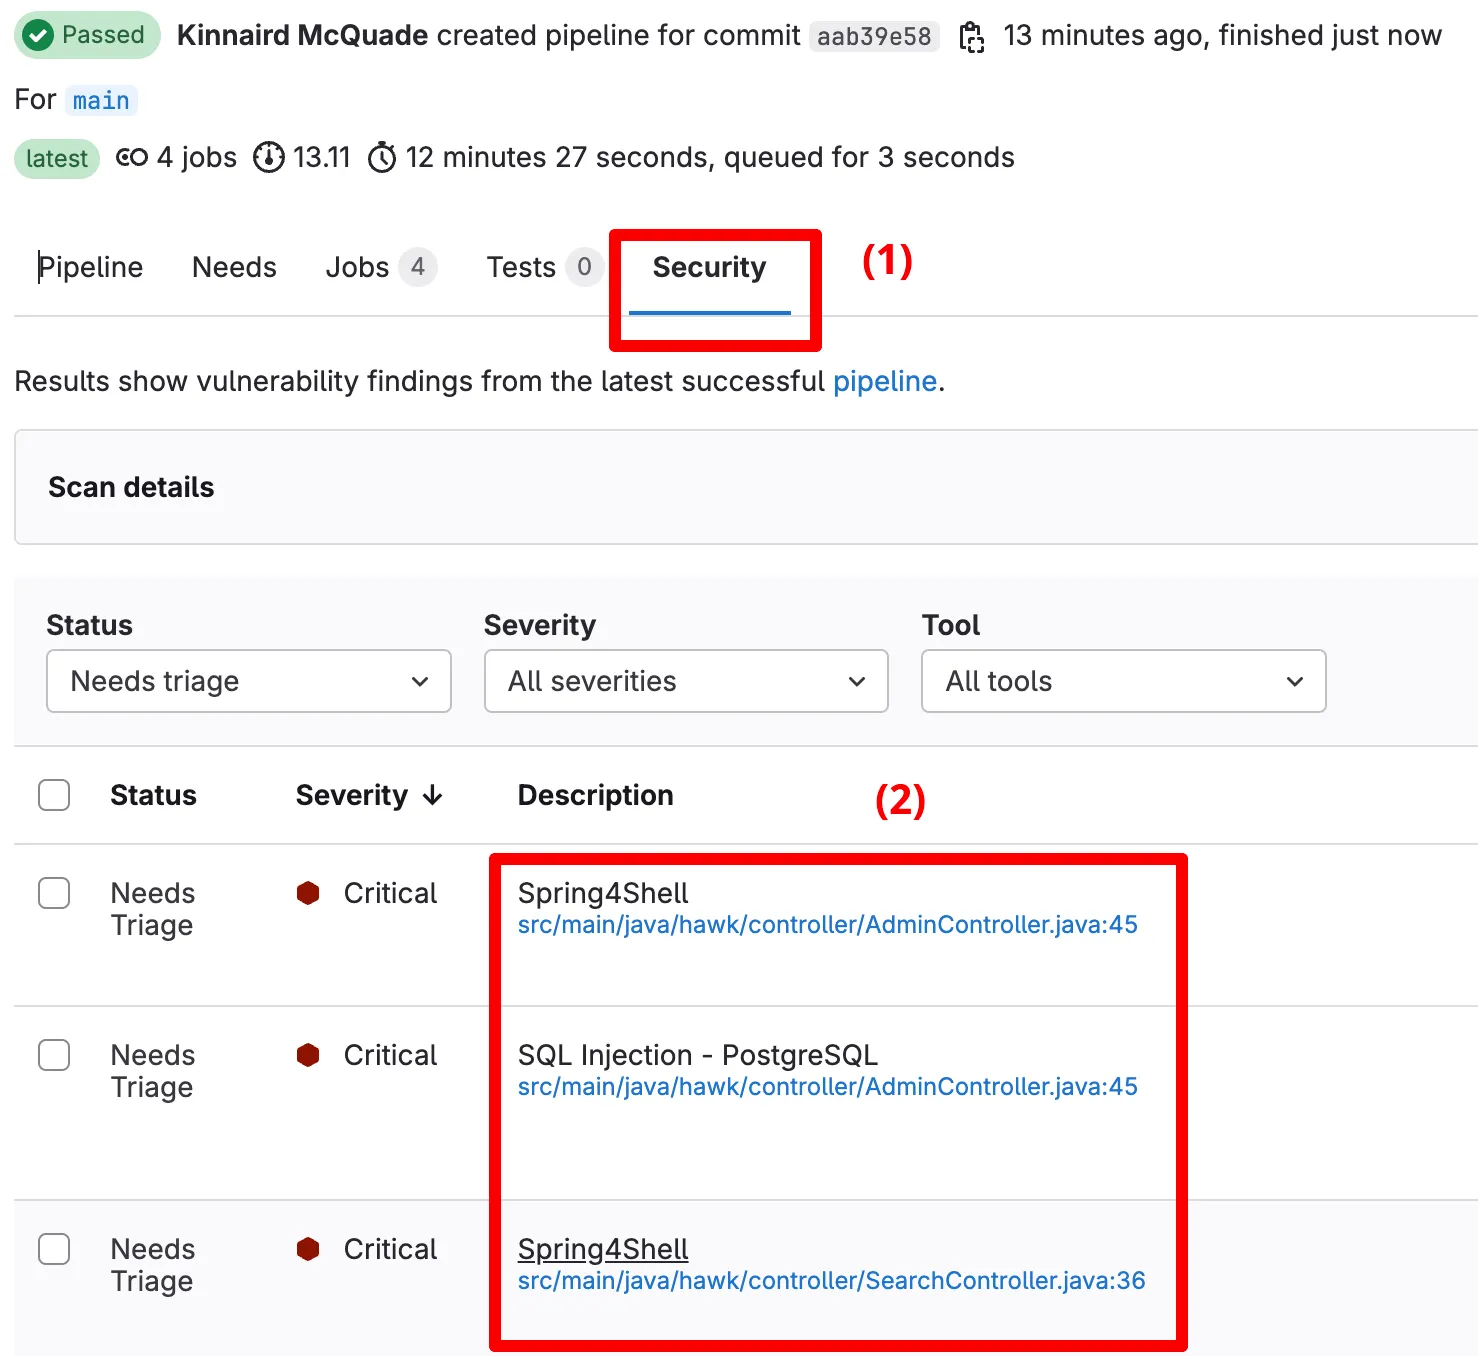
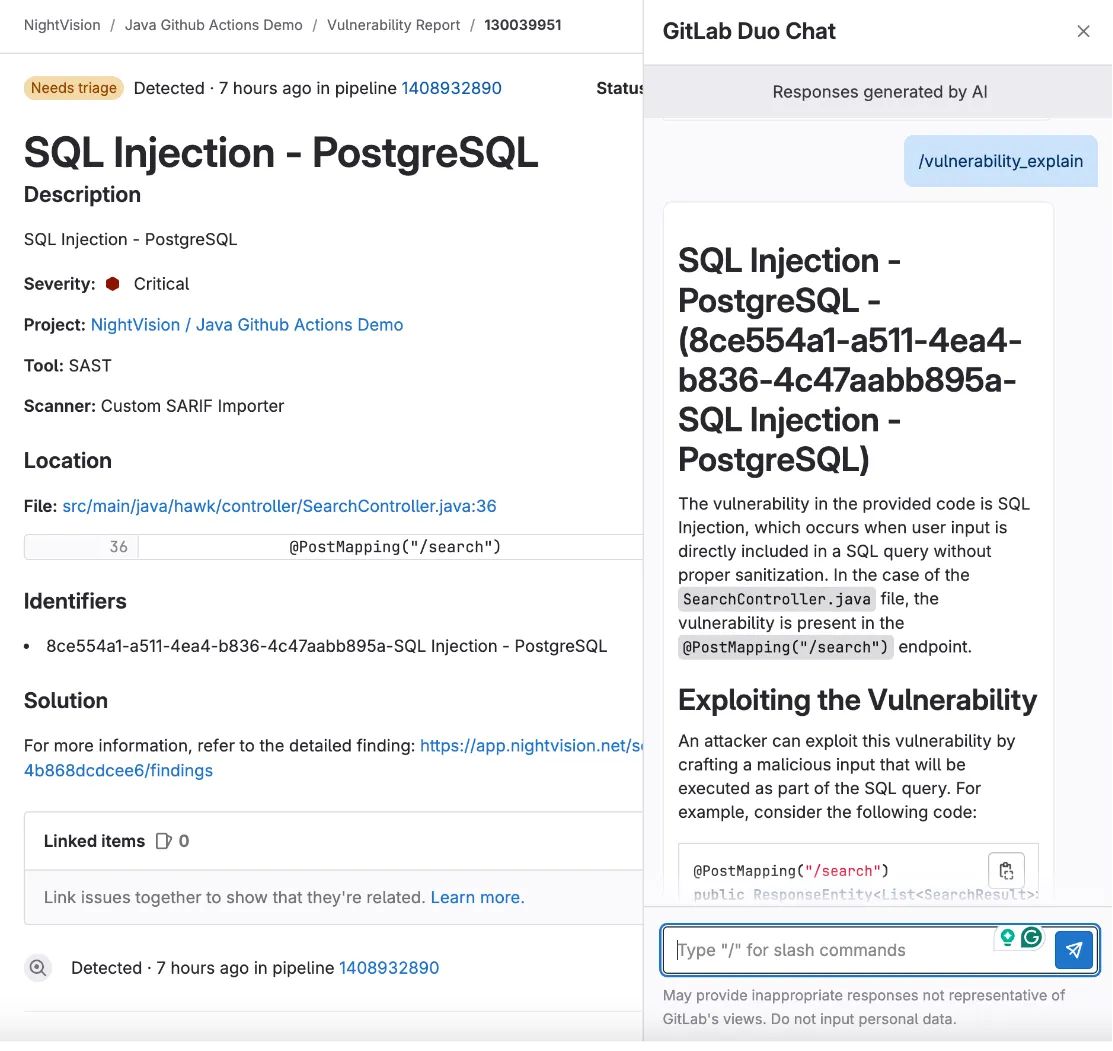
- You will see three critical alerts: (1) SQL Injection, (2) Cross-Site Scripting, and (3) Spring4Shell. Click on one of them.
- When you select one of the vulnerabilities, you can see the exact line of code where the vulnerable endpoint was defined. Click on the provided link.
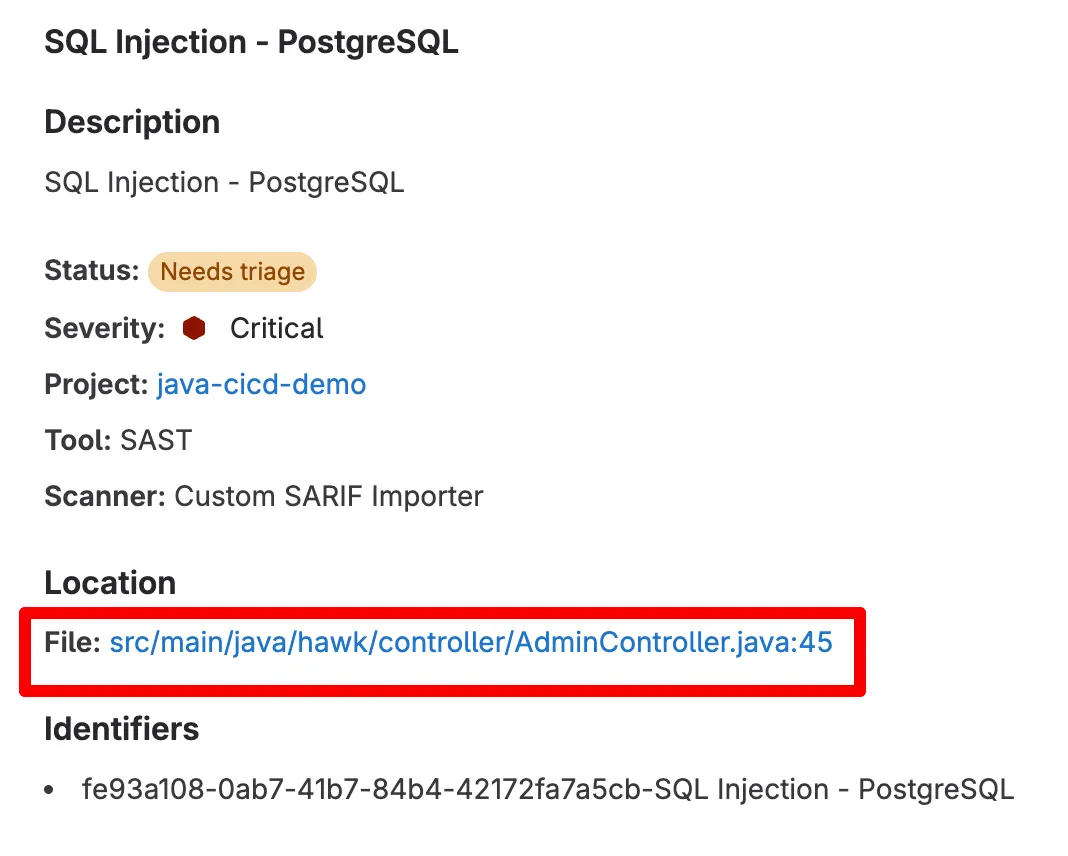
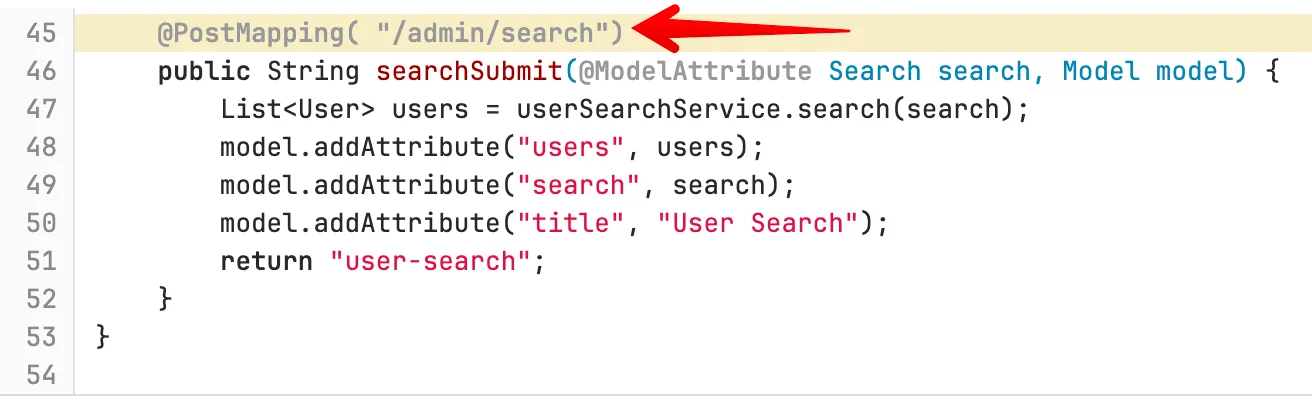
- After clicking on the link, it will bring you to the line of code where the endpoint was declared.
- You can also leverage the power of GitLab Duo Chat on an issue to get detailed ✨AI-powered✨ remediation guidance.