Quickstart
Why NightVision?
Section titled “Why NightVision?”NightVision is a platform for accelerating Application Security testing, while prioritizing exploitable issues - the ones that matter. With NightVision:
- Security teams can have confidence in the APIs that developers ship daily, knowing that all APIs are tested for exploitable security issues.
- Development teams can ship software while interacting less with the security team.
- Developers can trace any vulnerabilities back to the line of code and document their APIs.
- Penetration testers can increase coverage by using API discovery to scan undocumented shadow APIs.
Core Concepts
Section titled “Core Concepts”NightVision has two primary concepts: API Discovery and DAST Scans.
(1) API Discovery
Section titled “(1) API Discovery”API Discovery is the process of documenting APIs by scanning source code without prior knowledge of the code base.
Security teams, development teams, and platform engineers can all benefit from illuminating their APIs and automatically generating OpenAPI (a.k.a. Swagger) documentation and using it for development or testing purposes.
(2) DAST Scans
Section titled “(2) DAST Scans”Dynamic Application Security Testing (DAST for short) validates exploitable vulnerabilities by sending malicious traffic to the live application.
Before we get started, you should install the NightVision CLI.
Install the CLI
Section titled “Install the CLI”First, download the NightVision Command Line Interface (CLI):
Mac/Linux
Section titled “Mac/Linux”# Install:brew install nvsecurity/taps/nightvision
# Upgrade to the latest version:brew update && brew upgrade nightvisioncurl -L https://downloads.nightvision.net/binaries/latest/nightvision_latest_darwin_amd64.tar.gz | tar -xz; mv nightvision /usr/local/bin/curl -L https://downloads.nightvision.net/binaries/latest/nightvision_latest_darwin_arm64.tar.gz -q | tar -xz; mv nightvision /usr/local/bin/curl -L https://downloads.nightvision.net/binaries/latest/nightvision_latest_linux_amd64.tar.gz -q | tar -xz; sudo mv nightvision /usr/local/bin/curl -L https://downloads.nightvision.net/binaries/latest/nightvision_latest_linux_arm64.tar.gz -q | tar -xz; sudo mv nightvision /usr/local/bin/Windows Subsystem for Linux
Section titled “Windows Subsystem for Linux”If you’re using Windows Subsystem for Linux (WSL), install xdg-utils as a prerequisite. This will allow the CLI to open the browser to perform the login command.
sudo apt install xdg-utilsWindows (PowerShell)
Section titled “Windows (PowerShell)”- Launch PowerShell as an administrator.
- Click on the “Start” button located at the bottom-left corner of your screen or press the “Windows” key on your keyboard to open the Start Menu.
- In the search bar, type “PowerShell.” Right-click on “Windows PowerShell” in the search results.
- From the context menu that appears, select “Run as administrator.”
- Paste the commands below into your PowerShell terminal.
# Open a new Admin Powershell console
# Create the folder and add the new location into the PATH for the first time onlyNew-Item -ItemType Directory -Path "C:\Program Files\Nightvision\bin" -Force$env:Path = "$env:Path;C:\Program Files\Nightvision\bin"[Environment]::SetEnvironmentVariable("Path", $env:Path, "Machine")
# Run this block to install or update the appInvoke-WebRequest -Uri https://downloads.nightvision.net/binaries/latest/nightvision_latest_windows_amd64.tar.gz -OutFile nightvision_latest_windows_amd64.tar.gztar xf .\nightvision_latest_windows_amd64.tar.gz -C "C:\Program Files\Nightvision\bin"rm .\nightvision_latest_windows_amd64.tar.gz# Open a new Admin Powershell console
# Create the folder and add the new location into the PATH for the first time onlyNew-Item -ItemType Directory -Path "C:\Program Files\Nightvision\bin" -Force$env:Path = "$env:Path;C:\Program Files\Nightvision\bin"[Environment]::SetEnvironmentVariable("Path", $env:Path, "Machine")
# Run this block to install or update the appInvoke-WebRequest -Uri https://downloads.nightvision.net/binaries/latest/nightvision_latest_windows_arm64.tar.gz -OutFile nightvision_latest_windows_arm64.tar.gztar xf .\nightvision_latest_windows_arm64.tar.gz -C "C:\Program Files\Nightvision\bin"rm .\nightvision_latest_windows_arm64.tar.gzHelp Page
Section titled “Help Page”Append --help to any command to view usage information about the command or its subcommand.
# Root level commandnightvision --help
# Subcommand examplenightvision swagger extract --help
Authenticate the CLI
Section titled “Authenticate the CLI”Run the following to authenticate the CLI with your NightVision account. Alternatively, nightvision will respect the NIGHTVISION_TOKEN environment variable.
nightvision loginNow you’re ready for API Discovery and API Scanning!
API Discovery
Section titled “API Discovery”Let’s illuminate a REST API. We’ll download OWASP Juice Shop, create the relevant resources in NightVision, and view the API in the Swagger editor.
Prerequisites
Section titled “Prerequisites”Install the NightVision CLI. Follow the guide here to install the NightVision CLI on your system: Installing the CLI
First, clone the repository:
git clone https://github.com/juice-shop/juice-shopcd juice-shop(1) Run API Discovery
Section titled “(1) Run API Discovery”Now run this command:
nightvision swagger extract . --lang js --no-upload --output nv-swagger.ymlThe output will look like the following:
[2024-08-24 18:58:13] INFO Launching NightVision CLI[2024-08-24 18:58:14] INFO Initializing language provider[2024-08-24 18:58:15] INFO Finished initializing language provider[2024-08-24 18:58:15] INFO Starting language provider execution[2024-08-24 18:58:15] INFO Finished language provider execution[2024-08-24 18:58:15] INFO Starting generating OpenAPI document[2024-08-24 18:58:15] INFO OpenAPI document generated in 806.137541ms[2024-08-24 18:58:15] Number of discovered paths: 87[2024-08-24 18:58:15] Number of discovered classes: 0[2024-08-24 18:58:15] INFO Generated the OpenAPI document.[2024-08-24 18:58:15] INFO Successfully validated the output.(2) Measuring API Coverage
Section titled “(2) Measuring API Coverage”Juice Shop comes with a Swagger doc here, but it only contains one path - /orders. NightVision can provide much higher coverage for scanning APIs via API discovery. Let’s measure the improvement:
nightvision swagger diff swagger.yml nv-swagger.ymlAs you can see, NightVision found 108 unique API endpoints (combinations of URL paths and HTTP methods) compared to just one original API endpoint.
Paths: Added: 108 Modified: 0 Unchanged: 0 Undiscovered: 1Schemas: Added: 0 Modified: 0 Unchanged: 0 Undiscovered: 5To view more details about the newly discovered endpoints, append --paths to the swagger diff command.
nightvision swagger diff swagger.yml nv-swagger.yml --pathsThe output is below:
Added (108):+ GET: /api/Addresss+ POST: /api/Addresss+ DELETE: /api/Addresss/{id}+ GET: /api/Addresss/{id}+ PUT: /api/Addresss/{id}+ POST: /api/BasketItems+ PUT: /api/BasketItems/{id}+ GET: /api/Cards+ POST: /api/Cards+ DELETE: /api/Cards/{id}+ GET: /api/Cards/{id}+ PUT: /api/Cards/{id}+ POST: /api/Challenges+ GET: /api/Complaints+ POST: /api/Complaints+ GET: /api/Deliverys+ GET: /api/Deliverys/{id}+ POST: /api/Feedbacks+ PUT: /api/Feedbacks/{id}+ GET: /api/PrivacyRequests+ POST: /api/PrivacyRequests+ POST: /api/Products+ DELETE: /api/Products/{id}+ POST: /api/Quantitys+ DELETE: /api/Quantitys/{id}+ GET: /api/Recycles+ POST: /api/Recycles+ DELETE: /api/Recycles/{id}+ GET: /api/Recycles/{id}+ PUT: /api/Recycles/{id}+ GET: /api/SecurityAnswers+ POST: /api/SecurityQuestions+ GET: /api/Users+ POST: /api/Users+ DELETE: /api/Users/{id}+ GET: /api/Users/{id}+ PUT: /api/Users/{id}+ GET: /array_1065+ POST: /b2b/v2/orders+ GET: /dataerasure/+ POST: /dataerasure/+ POST: /file-upload+ GET: /metrics+ GET: /profile+ POST: /profile+ POST: /profile/image/file+ POST: /profile/image/url+ GET: /promotion+ GET: /redirect+ POST: /rest/2fa/disable+ POST: /rest/2fa/setup+ GET: /rest/2fa/status+ POST: /rest/2fa/verify+ GET: /rest/admin/application-configuration+ GET: /rest/admin/application-version+ GET: /rest/basket/{id}+ POST: /rest/basket/{id}/checkout+ PUT: /rest/basket/{id}/coupon/{coupon}+ GET: /rest/captcha+ POST: /rest/chatbot/respond+ GET: /rest/chatbot/status+ GET: /rest/continue-code+ GET: /rest/continue-code-findIt+ PUT: /rest/continue-code-findIt/apply/{continueCode}+ GET: /rest/continue-code-fixIt+ PUT: /rest/continue-code-fixIt/apply/{continueCode}+ PUT: /rest/continue-code/apply/{continueCode}+ GET: /rest/country-mapping+ GET: /rest/deluxe-membership+ POST: /rest/deluxe-membership+ GET: /rest/image-captcha+ GET: /rest/languages+ GET: /rest/memories+ POST: /rest/memories+ GET: /rest/order-history+ GET: /rest/order-history/orders+ PUT: /rest/order-history/{id}/delivery-status+ PATCH: /rest/products/reviews+ POST: /rest/products/reviews+ GET: /rest/products/search+ GET: /rest/products/{id}/reviews+ PUT: /rest/products/{id}/reviews+ GET: /rest/repeat-notification+ GET: /rest/saveLoginIp+ GET: /rest/track-order/{id}+ GET: /rest/user/authentication-details+ GET: /rest/user/change-password+ POST: /rest/user/data-export+ POST: /rest/user/login+ POST: /rest/user/reset-password+ GET: /rest/user/security-question+ GET: /rest/user/whoami+ GET: /rest/wallet/balance+ PUT: /rest/wallet/balance+ GET: /rest/web3/nftMintListen+ GET: /rest/web3/nftUnlocked+ POST: /rest/web3/submitKey+ POST: /rest/web3/walletExploitAddress+ POST: /rest/web3/walletNFTVerify+ GET: /snippets+ POST: /snippets/fixes+ GET: /snippets/fixes/{key}+ POST: /snippets/verdict+ GET: /snippets/{challenge}+ GET: /the/devs/are/so/funny/they/hid/an/easter/egg/within/the/easter/egg+ GET: /this/page/is/hidden/behind/an/incredibly/high/paywall/that/could/only/be/unlocked/by/sending/1btc/to/us+ GET: /video+ GET: /we/may/also/instruct/you/to/refuse/all/reasonably/necessary/responsibility
Undiscovered (1):- POST: /ordersMore Details
Section titled “More Details”NightVision’s API Discovery (patent pending) supports dozens of API frameworks and hundreds of framework components. For more details, see the following:
Next, let’s learn how to leverage API Discovery for ridiculously fast security scans!
API Scans
Section titled “API Scans”Let’s try another application.
In this tutorial, you’ll download Broken Flask, create the relevant resources in NightVision, and test the API.
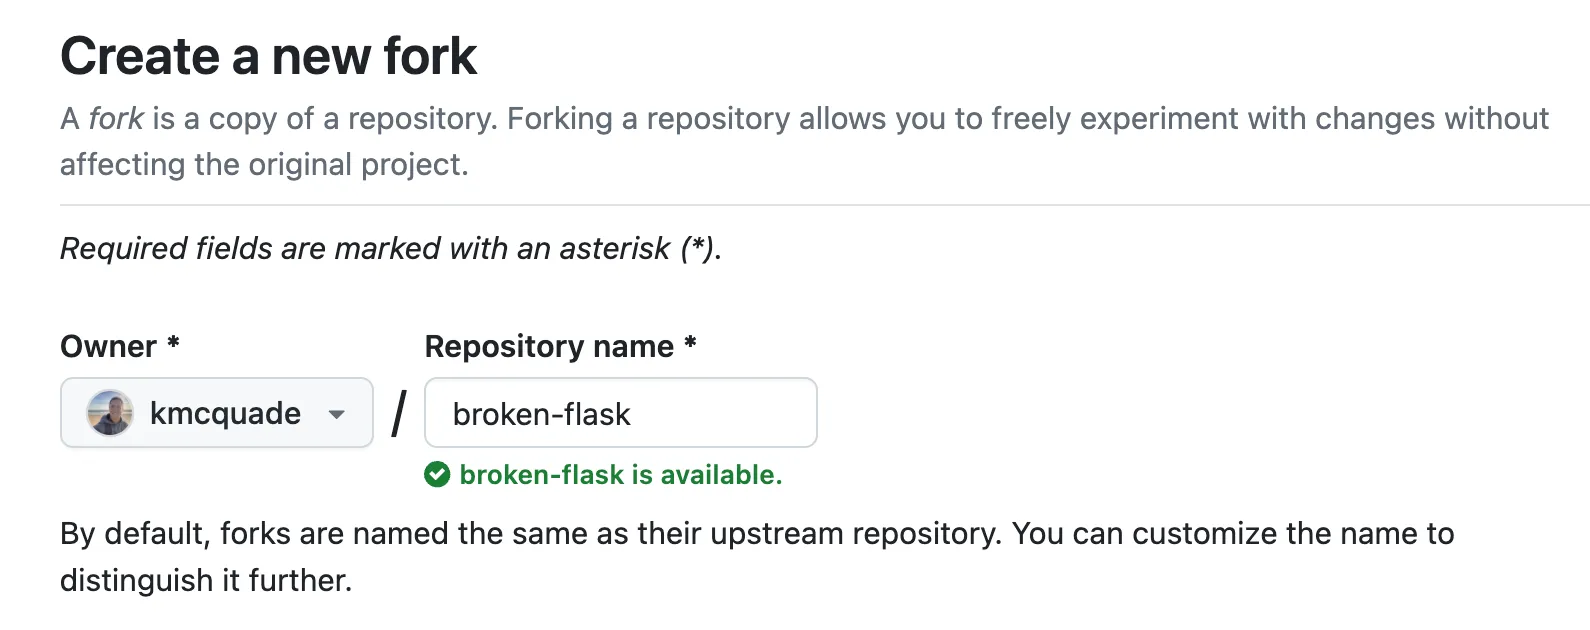
First, fork the repository to your GitHub account by clicking this link: https://github.com/nvsecurity/broken-flask/fork
Clone the repository:
# Change this to your GitHub usernameexport GITHUB_USER=YourUsername
git clone https://github.com/$GITHUB_USER/broken-flaskcd broken-flask
(1) Start the app
Section titled “(1) Start the app”You’ll need to start the app locally so you can scan it. Launch the app with Docker compose:
docker compose up -d(2) Create the Target
Section titled “(2) Create the Target”Create the Target inside NightVision.
nightvision target create broken-flask-api http://localhost:4000 --type API(3) API Discovery
Section titled “(3) API Discovery”Next, perform the API discovery by running the following command.
nightvision swagger extract . --target broken-flask-api --lang python(4) Run the scan
Section titled “(4) Run the scan”Now run the scan:
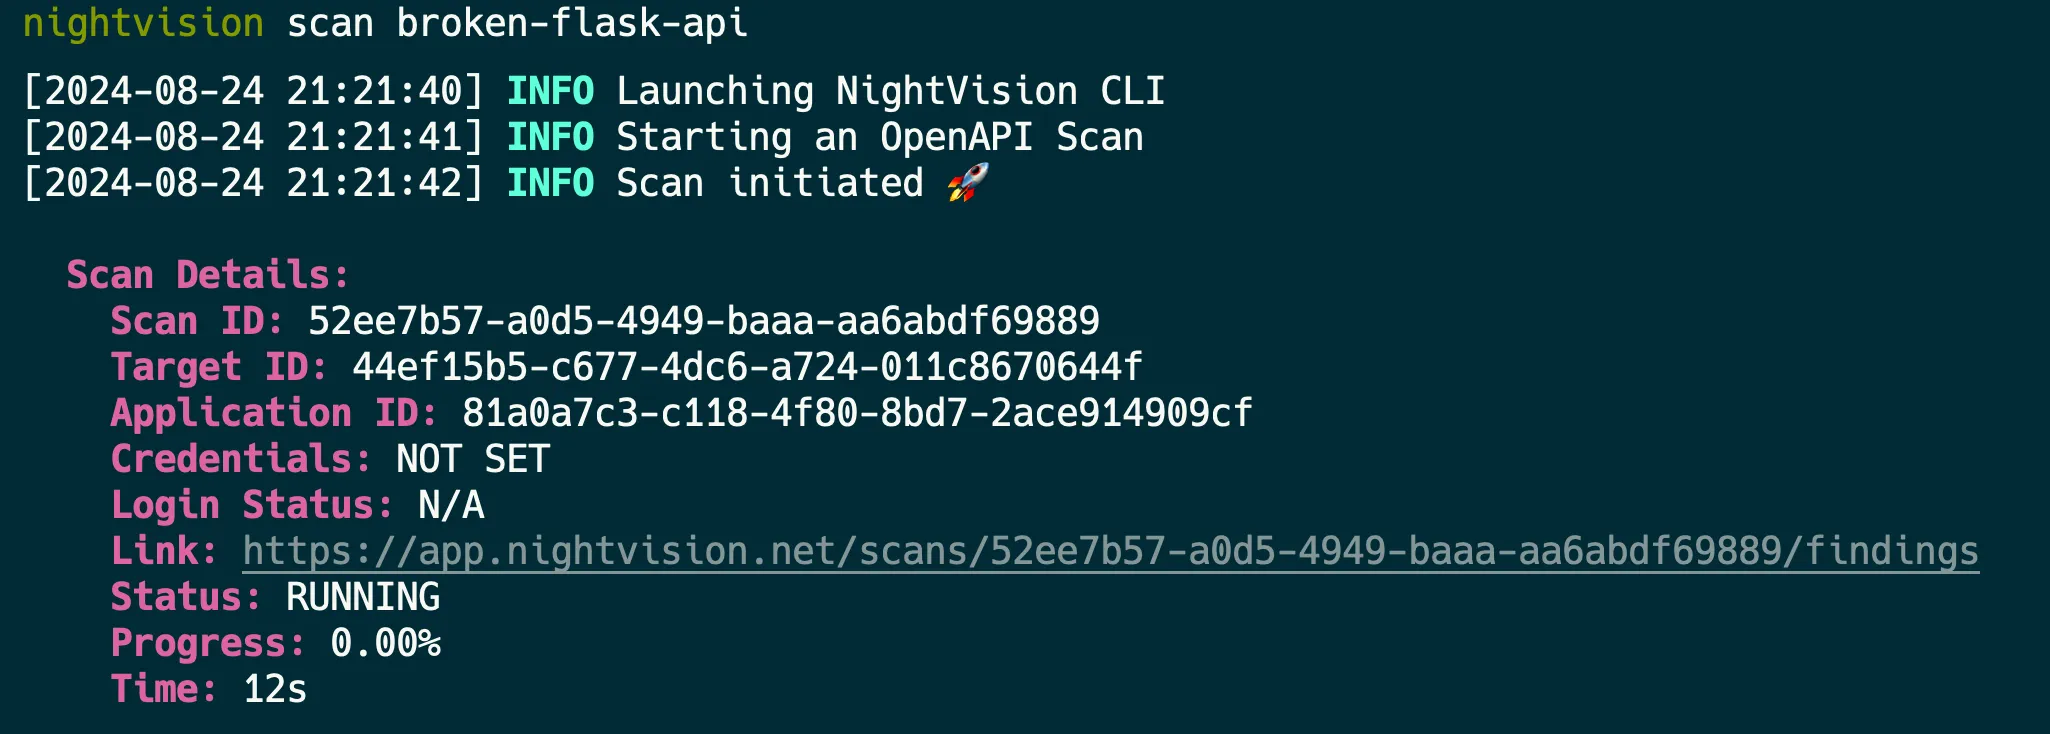
nightvision scan broken-flask-apiIt will launch a scan. You can monitor the progress by clicking on the link to the scan.
(5) View Scan Results
Section titled “(5) View Scan Results”Once the scan is completed, the results will be opened in your web browser.
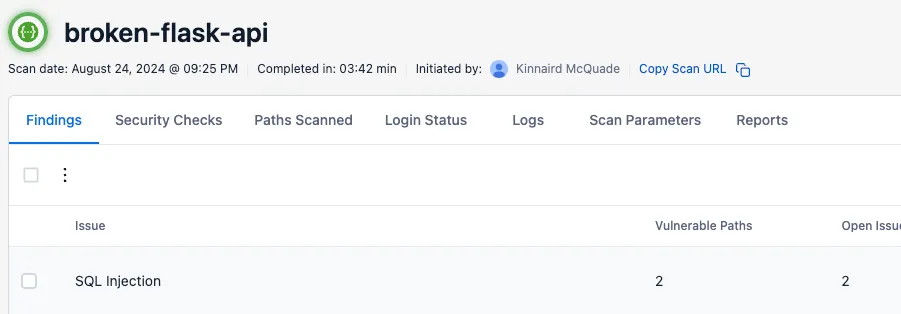
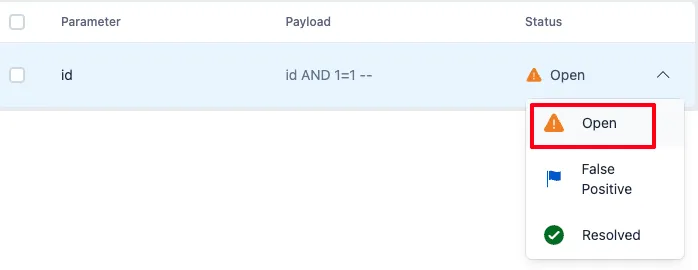
If you click on an issue, you’ll see a list of the URL paths, parameters, and payloads for a vulnerability type.
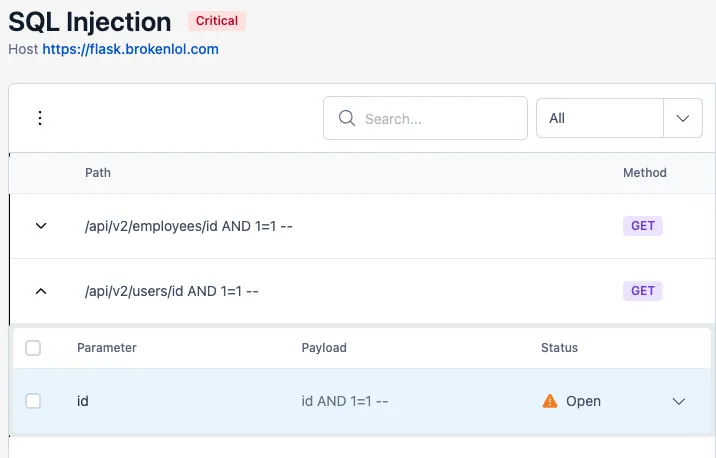
You can also click on the Status dropdown to mark an issue as ⚠️ Open, 🚩 False Positive, or ✅ Resolved.
When you click on an issue instance, you’ll see more details:
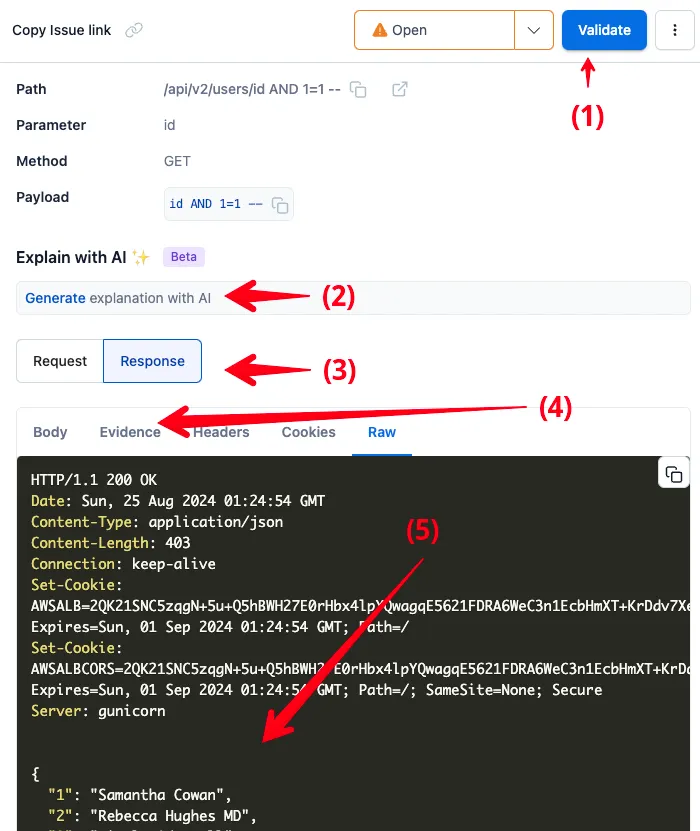
If you’re less familiar with Application Security or pentesting, the first two items are probably most interesting to you.
If you’re an experienced pentester, you’ll probably care more about 3-5.
- Validate with curl: The “Validate button” gives you a
curlcommand that you can run from your machine to replicate the HTTP response, and validate the vulnerability. This can be useful in regression/integration tests. - Explain with AI: The Explain with AI feature will explain the vulnerability in simple terms, how it manifested in this HTTP response, and the impact.
- Request/Response: You can click here to view the HTTP Request used to trigger the vulnerability, or the HTTP Response that shows the response indicating the vulnerability.
- Evidence: The Evidence tab will display information that was reflected in the response or other data that indicates the vulnerability exists, to help with your investigation.
- Raw HTTP response: The raw HTTP request/response body can be viewed in the panel.
Code Traceback
Section titled “Code Traceback”In this tutorial, you’ll learn how to:
- Integrate NightVision DAST scans into your CI/CD pipelines to find exploitable vulnerabilities within minutes automatically.
- Use NightVision’s API Extraction to scan the source code to find the attack vector in the file and line of code.
- Create GitHub Security Alerts so developers can view the vulnerabilities directly in GitHub.
Preview: Example Results
Section titled “Preview: Example Results”Here’s what the results will look like:
Prerequisites
Section titled “Prerequisites”Before we get started, you’ll need to fork the example repository.
Fork the Repository
Section titled “Fork the Repository”- First, sign into GitHub.
- After you are signed into GitHub, fork the example repository: https://github.com/nvsecurity/java-github-actions-demo/fork
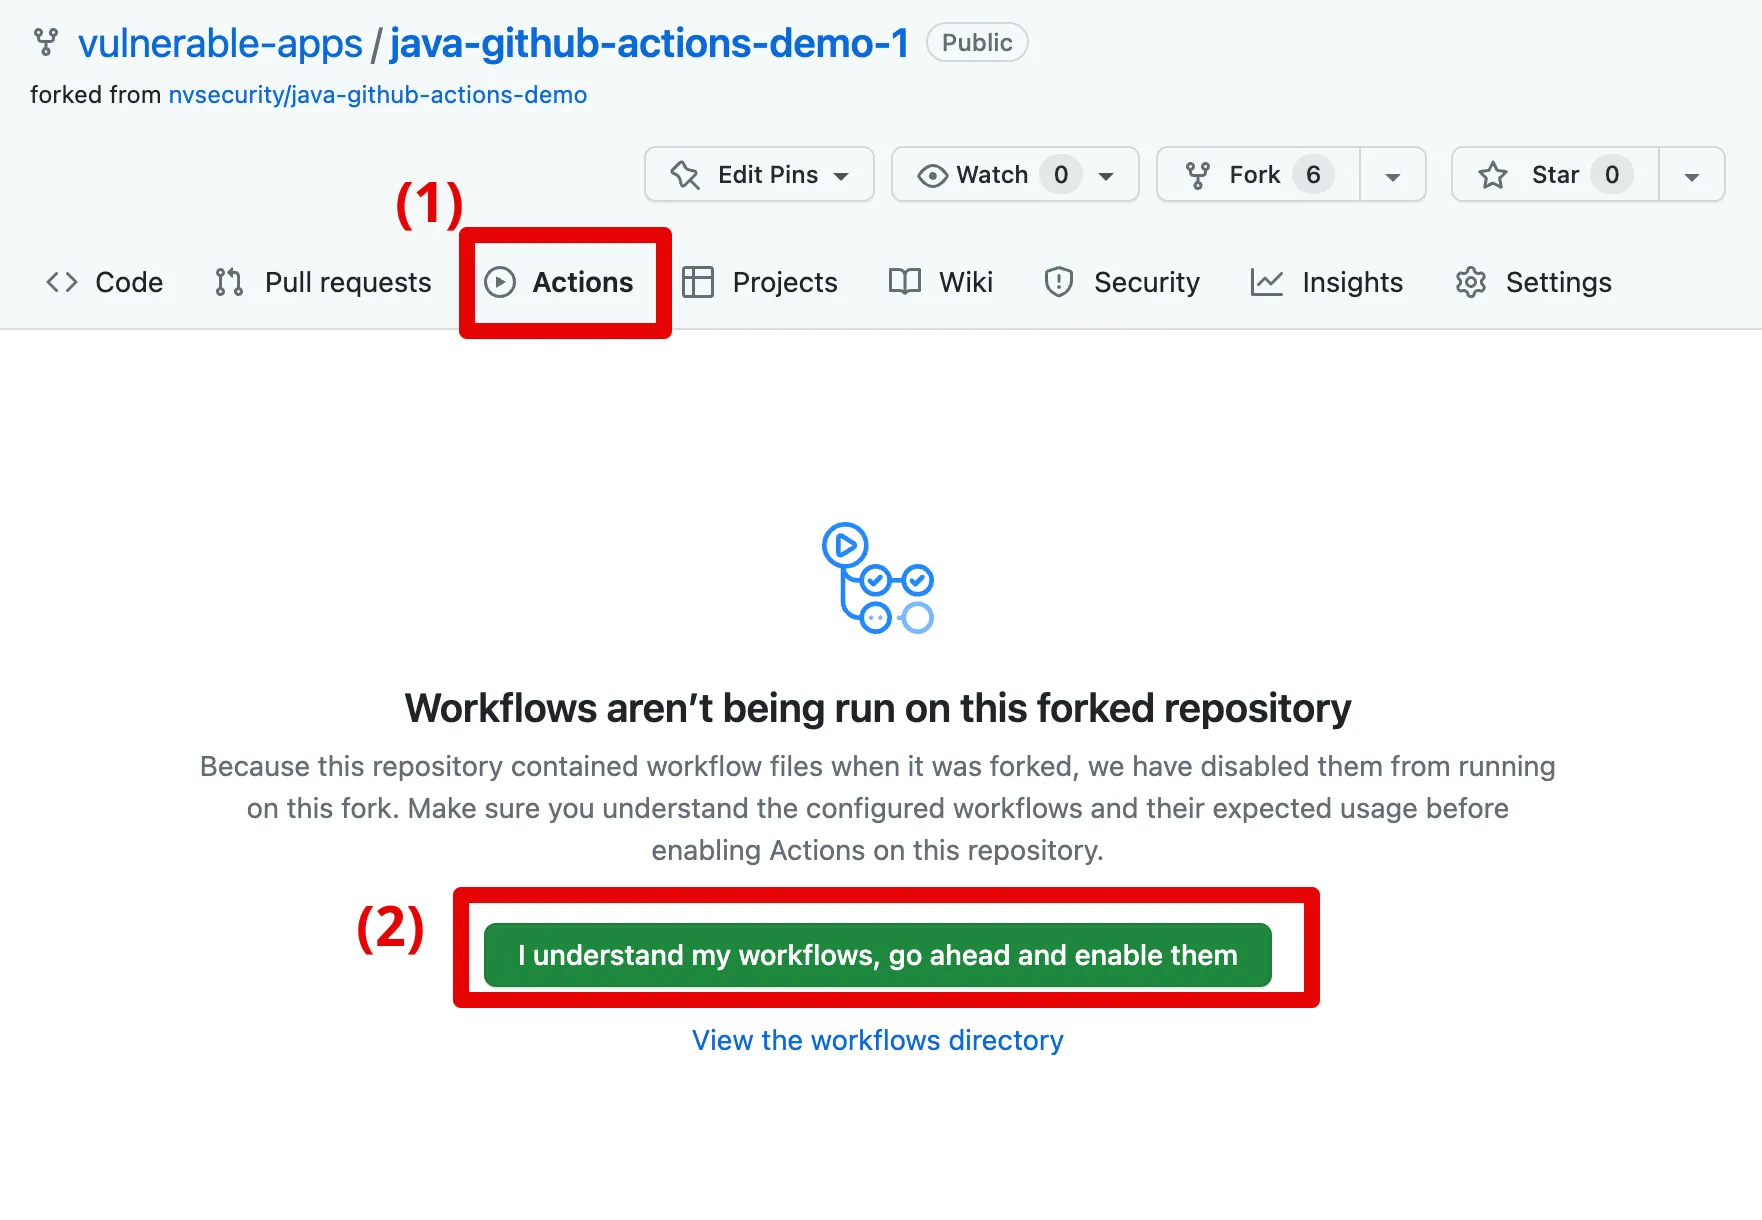
- Click on Actions from the forked repository and enable GitHub workflows for the repository, as shown here.
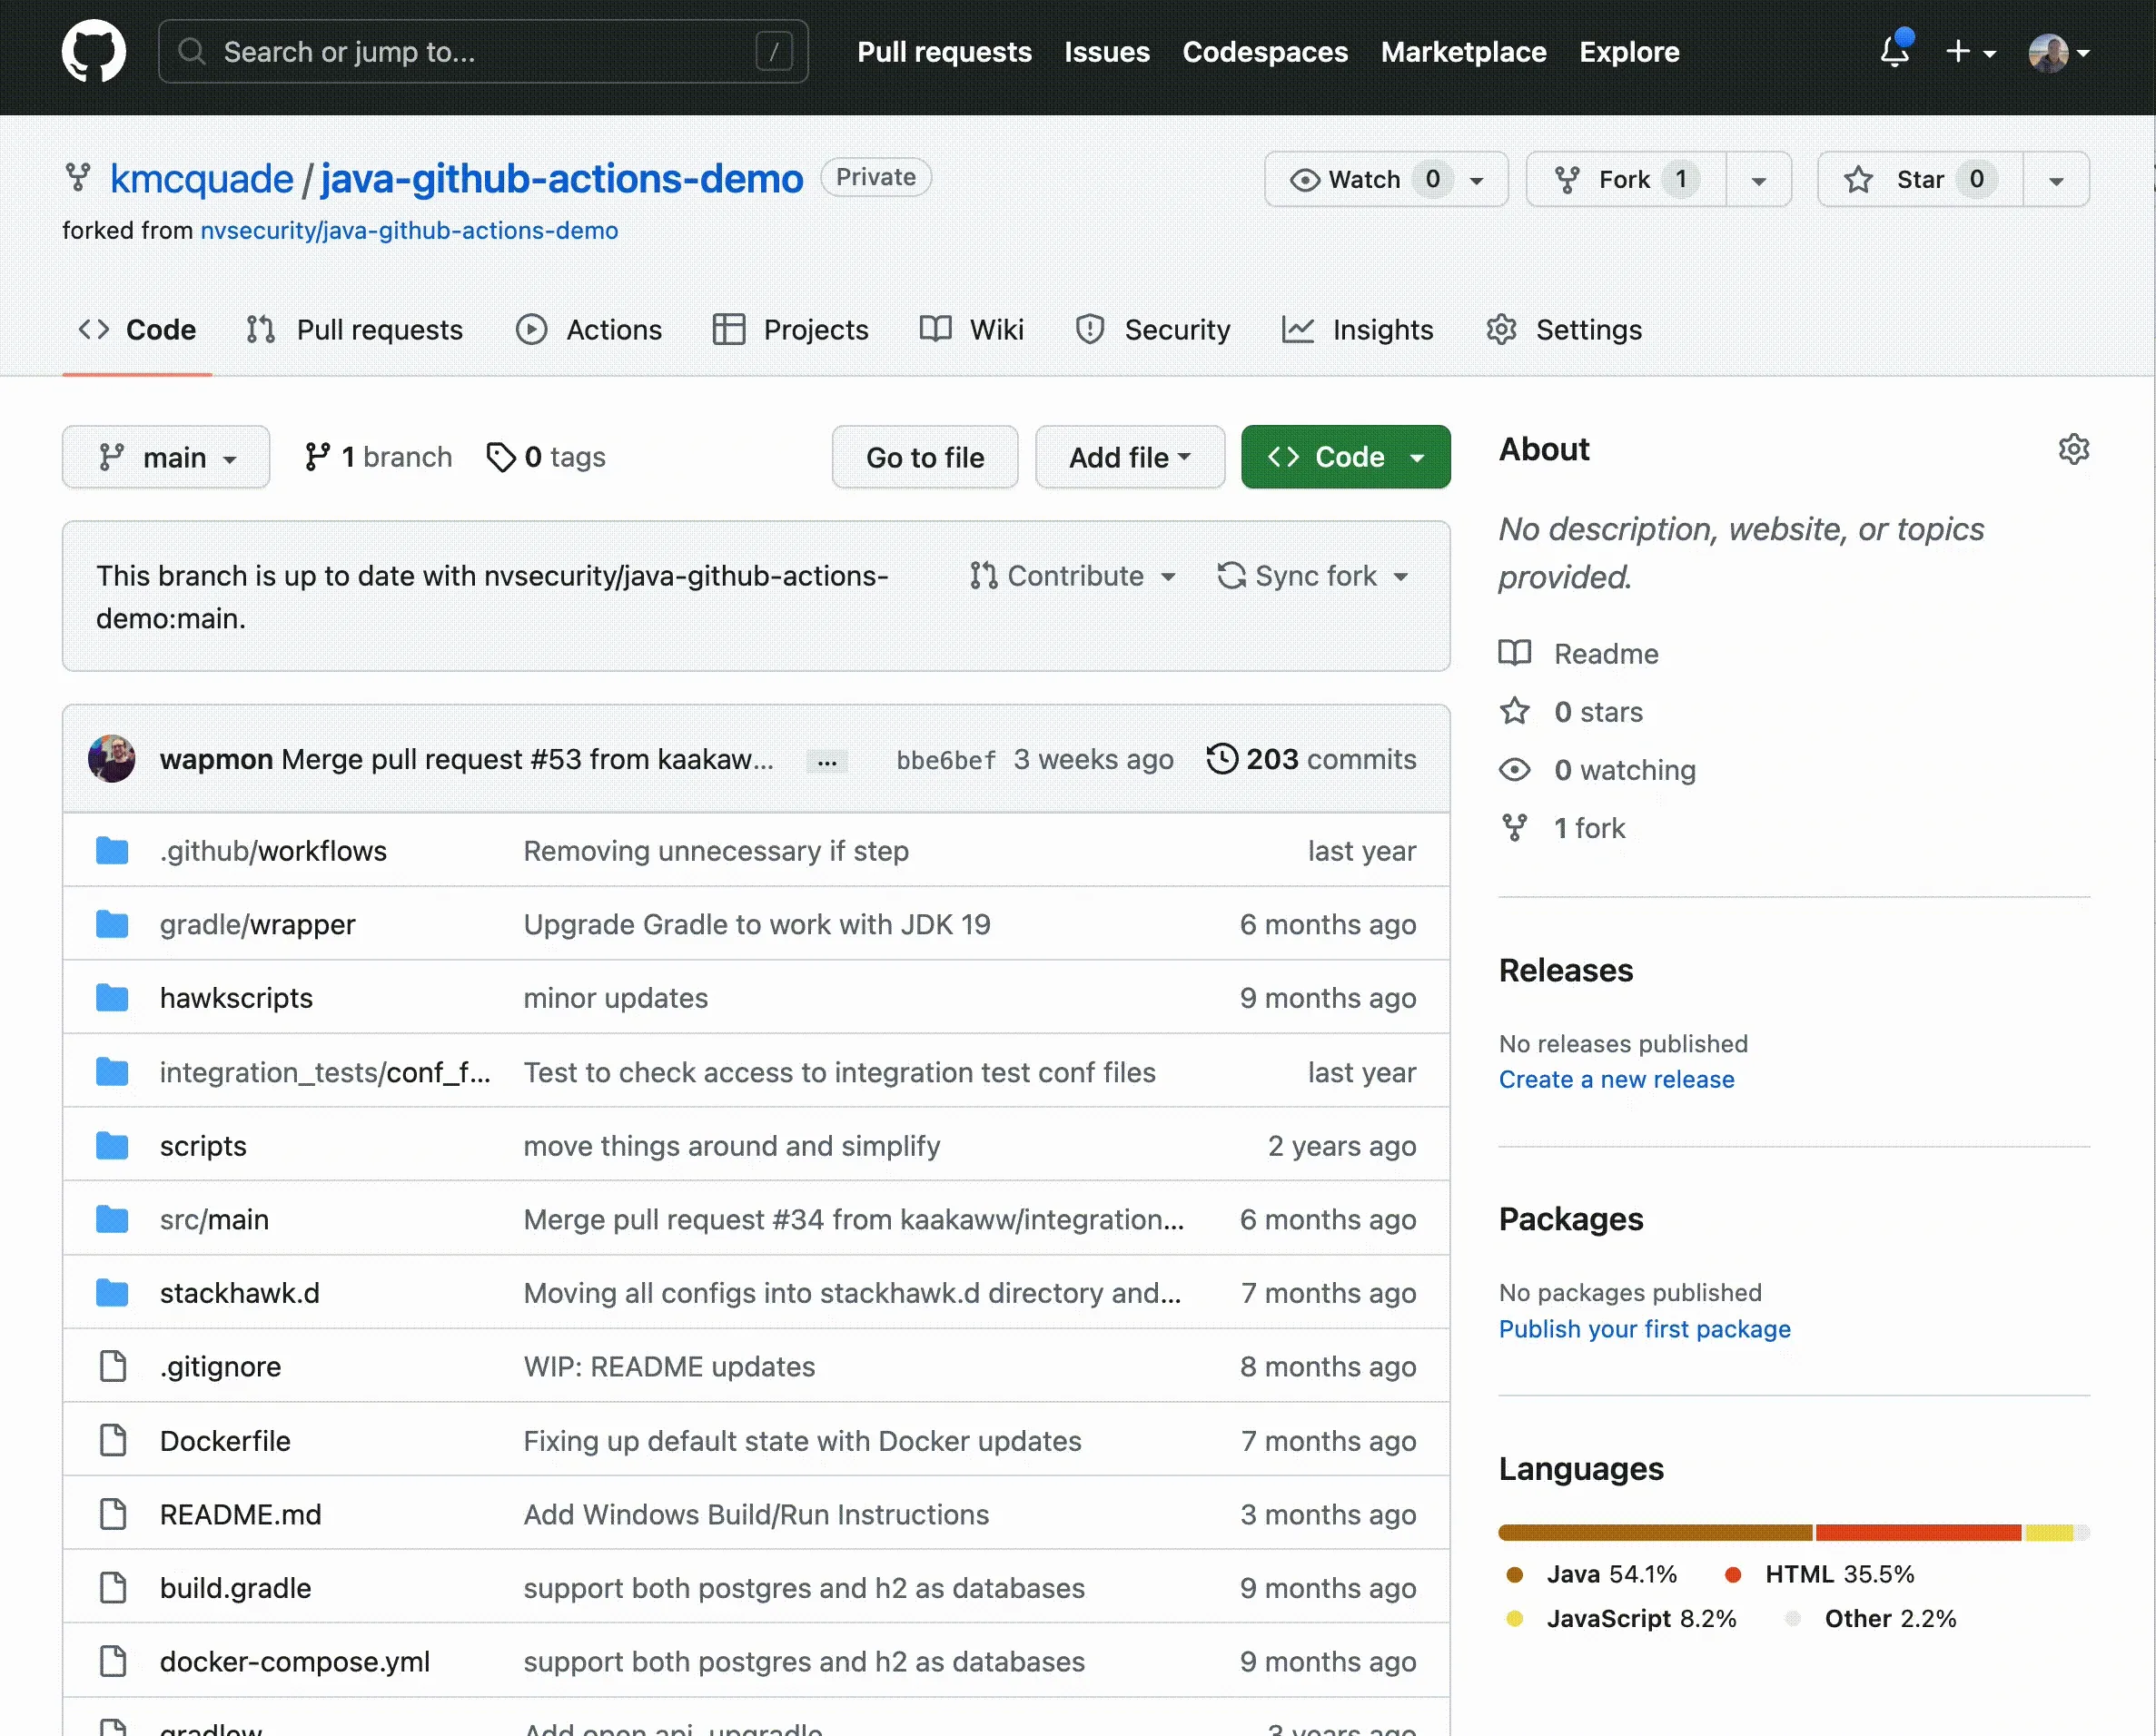
Once you have created a fork, you can manually navigate to it by following these steps:
- Click on the fork’s profile icon at the top right corner of the GitHub website
- Select Your repositories
- Find the fork in the list of repositories on that page.
Now you’re ready for the tutorial! After 5 simple steps, you will have automated DAST scans running on every commit. 🤯 🚀
(1) Log into NightVision
Section titled “(1) Log into NightVision”- Next, make sure you have installed the NightVision Command Line. For instructions, see Installing the CLI.
- In your terminal, run the following command. This will launch a browser window and log you into NightVision.
nightvision login(2) Get a NightVision Token
Section titled “(2) Get a NightVision Token”- Next, run this command to get a NightVision token:
nightvision token create- Copy the value of the token.
(3) Create a Secret in GitHub Actions
Section titled “(3) Create a Secret in GitHub Actions”- In GitHub, create a GitHub Actions Repository Secret called
NIGHTVISION_TOKENwith the token value.- To create a new Repository Secret for GitHub Actions, you can follow these steps (also depicted in the GIF below):
- From the repository, click on Settings
- Click on Secrets and Keys in the left panel and then on Actions under it.
- Click on the New repository secret button.
- In the Name field, type
NIGHTVISION_TOKEN - In the Secret field, paste the token value you copied in “Get a NightVision Token.”
- To create a new Repository Secret for GitHub Actions, you can follow these steps (also depicted in the GIF below):
(4) Record Authentication
Section titled “(4) Record Authentication”- Next, you will need to spin up the application locally and log into it with test credentials.
- Username:
user - Password:
password
- Username:
# Clone the repository locally from your terminalgit clone https://github.com/$(git config user.name)/java-github-actions-demo.gitcd java-github-actions-demo
# Start the applicationdocker-compose up -d; sleep 10
# Record authentication - click on Form Auth# Username: user# Password: passwordURL="https://localhost:9000"Name="javaspringvulny-api"
nightvision target create $Name $URL --type apinightvision auth playwright create $Name $URL
(5) Push Code Changes
Section titled “(5) Push Code Changes”- Push your code changes to trigger a scan. From the root of the repository, run the following command:
# Add a commit and trigger the CI/CDecho "foobar" >> README.mdgit commit -am 'trigger a github action'git pushNow open your GitHub repository in the browser.
The scan will be complete in about 3 minutes. 🤯
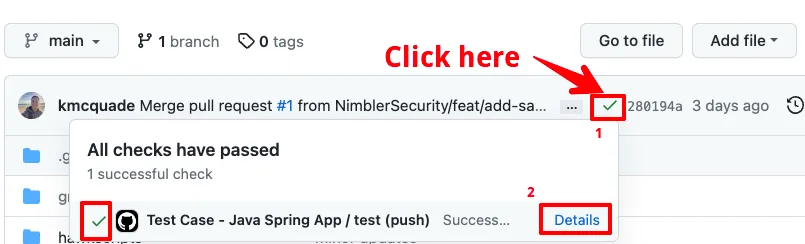
- Optionally, you can click on the GitHub Action execution to watch it run, as indicated here:
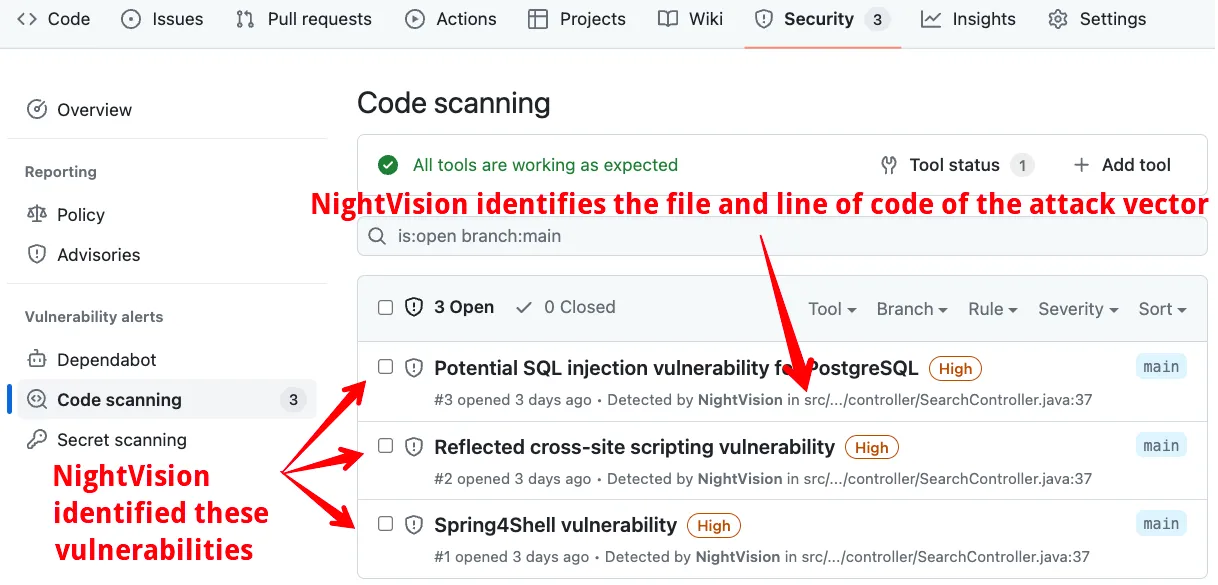
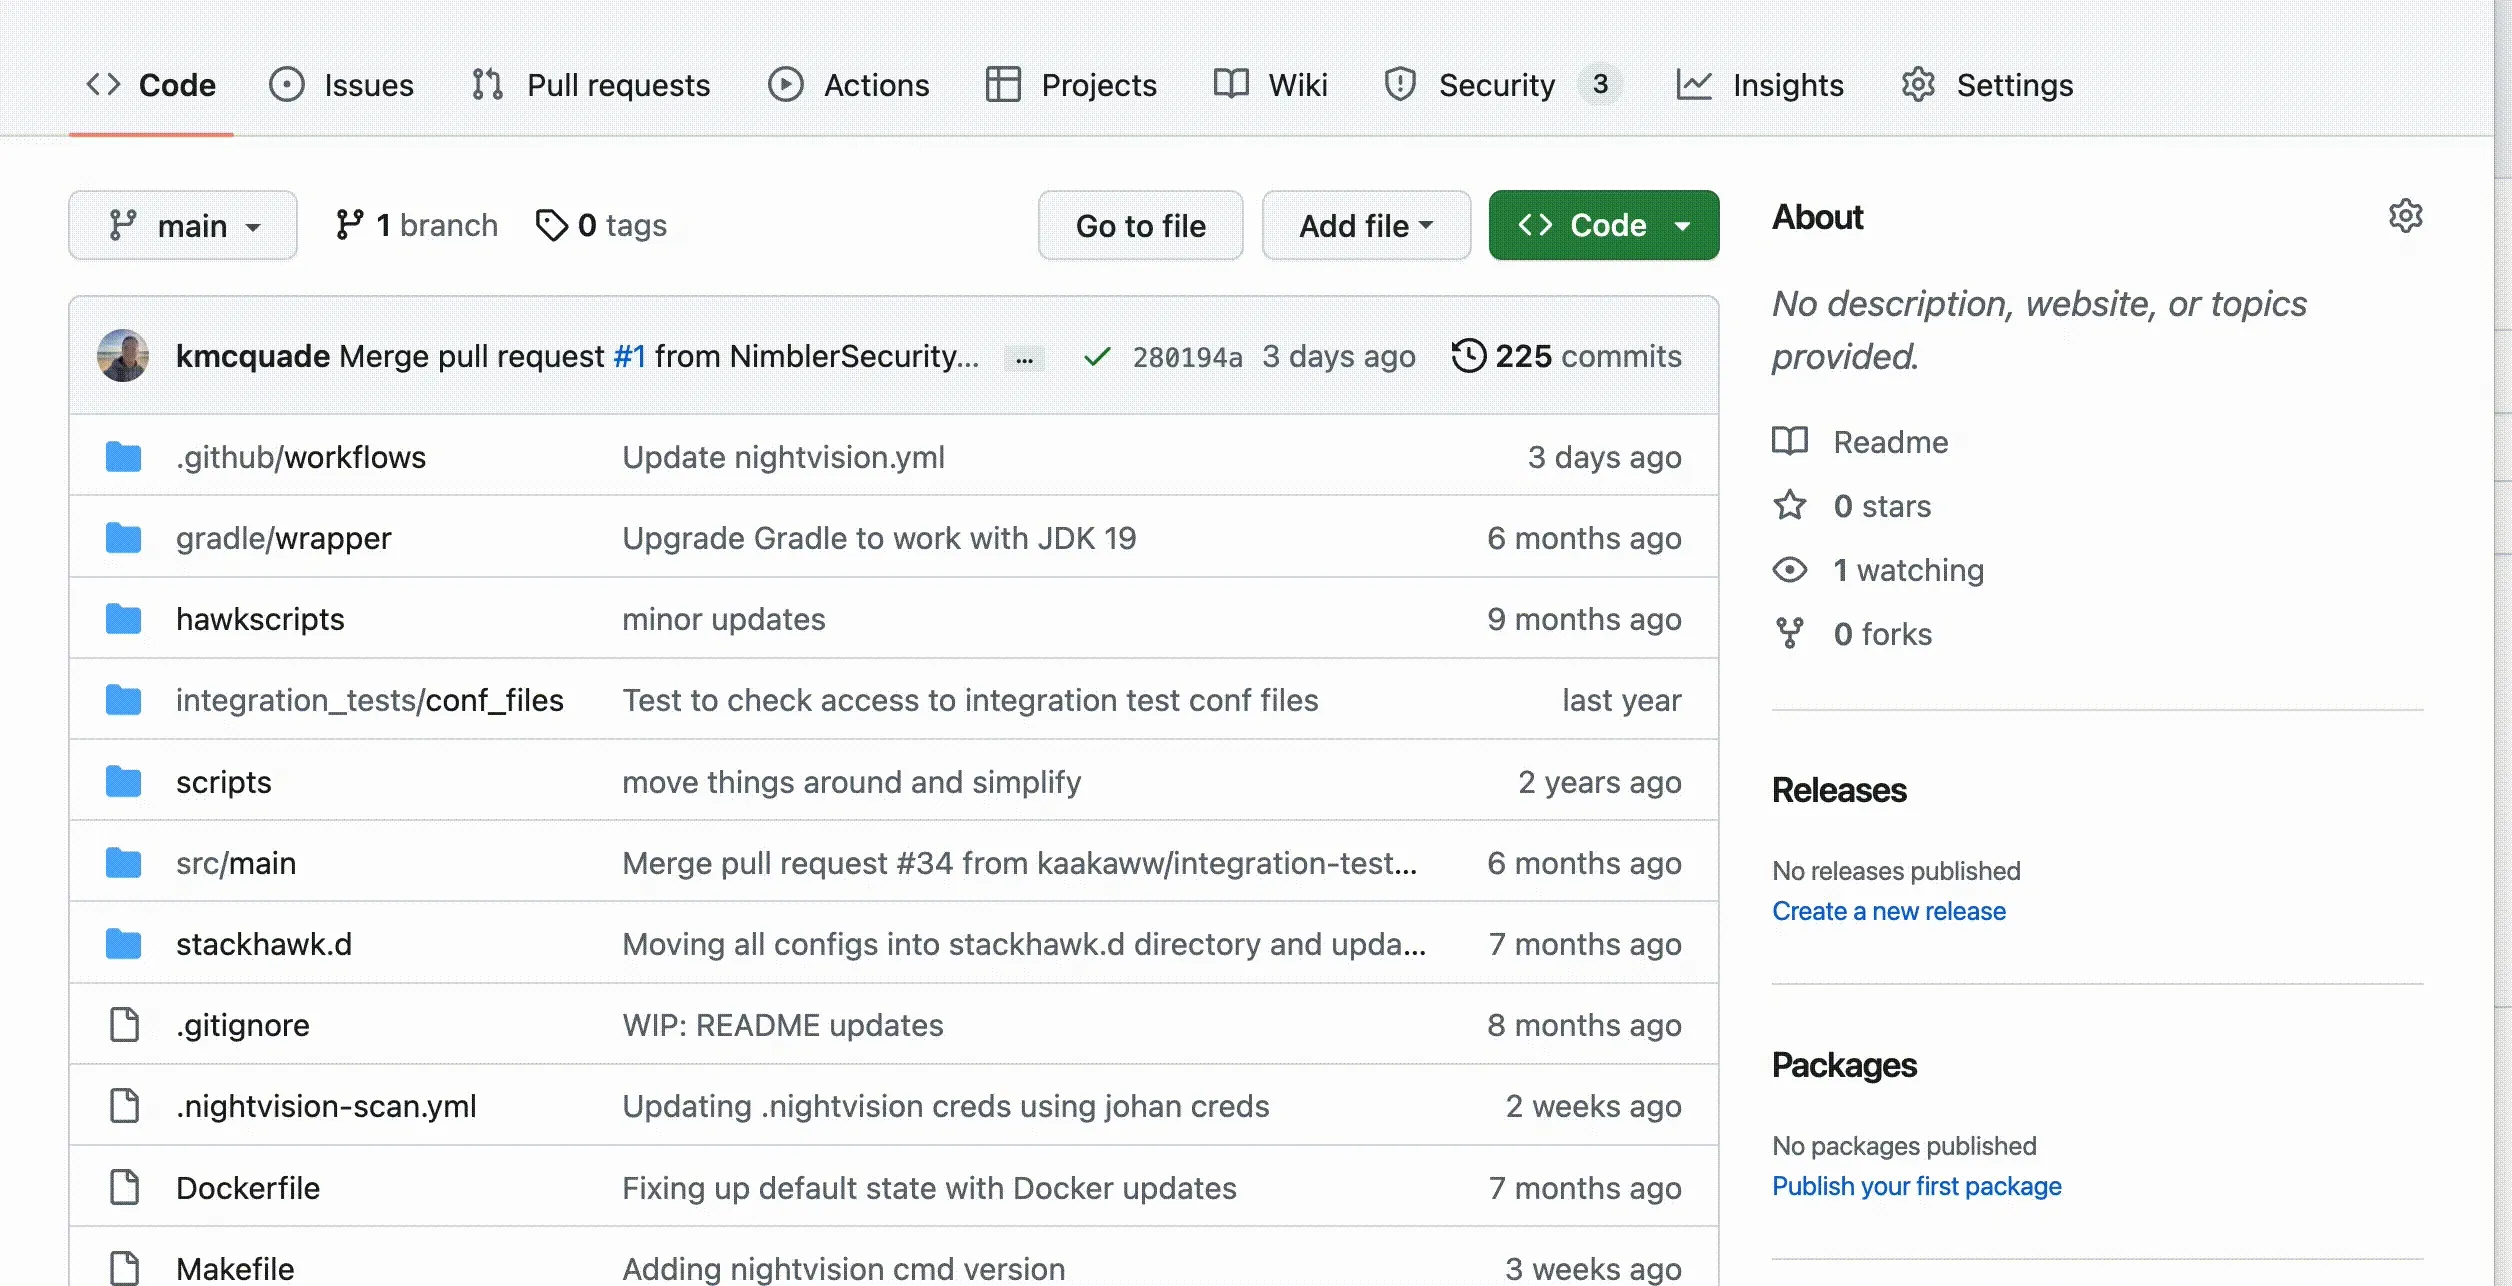
- When the scan finishes, click on the Security tab at the top of the page and then on Code Scanning from the left panel.
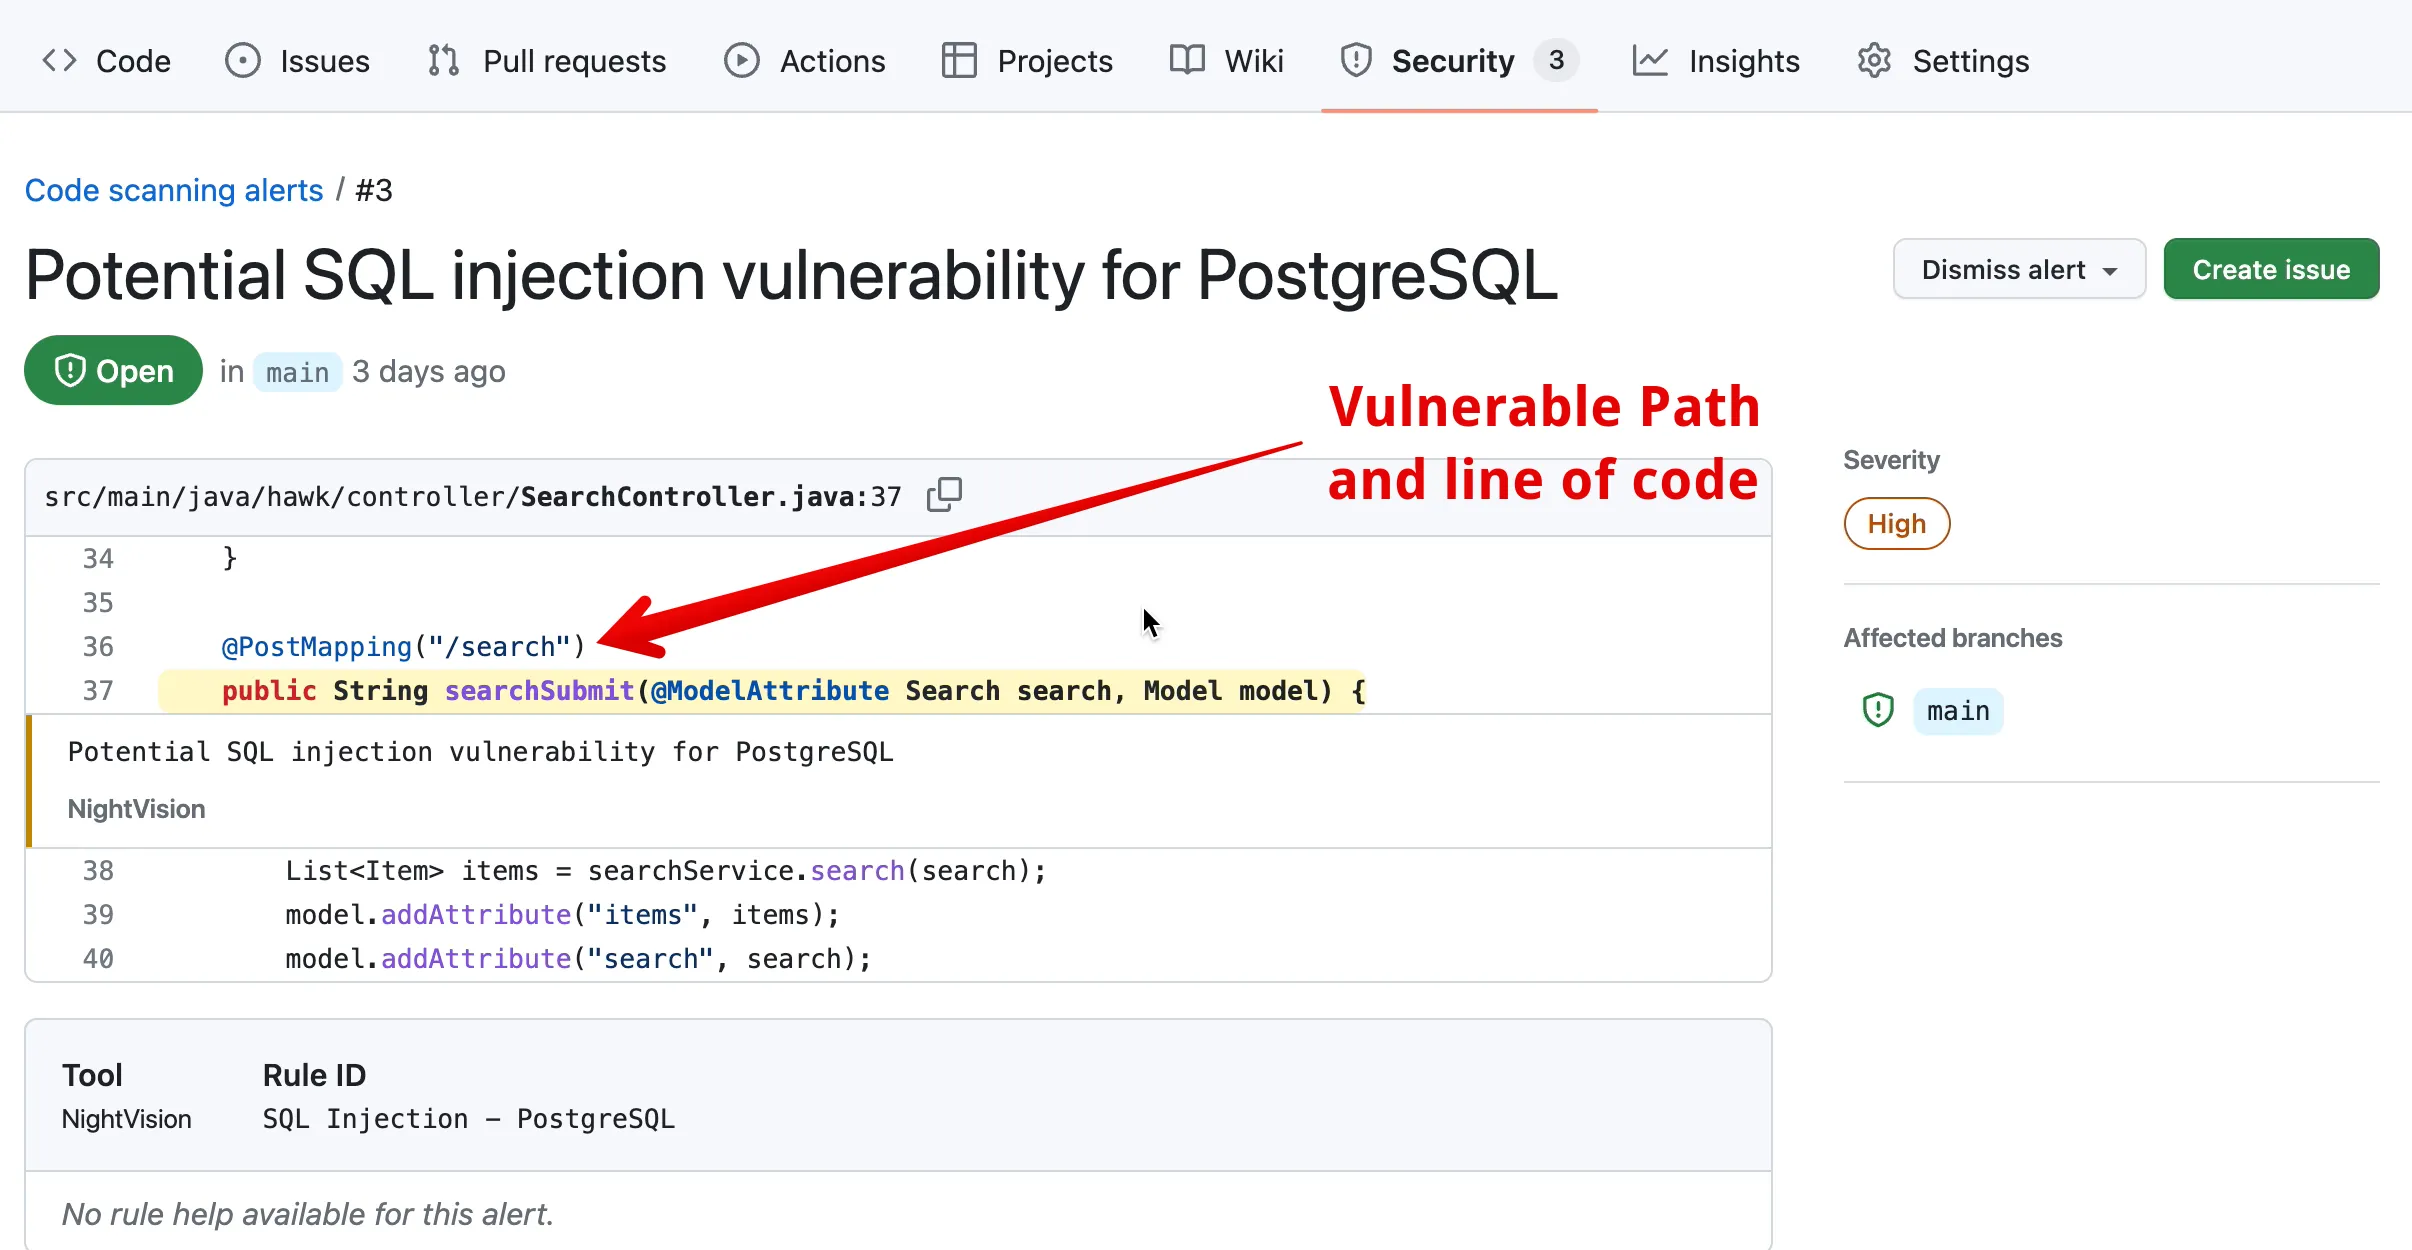
- You will see three security alerts: (1) SQL Injection, (2) Cross-Site Scripting, and (3) Spring4Shell. Click on one of them.
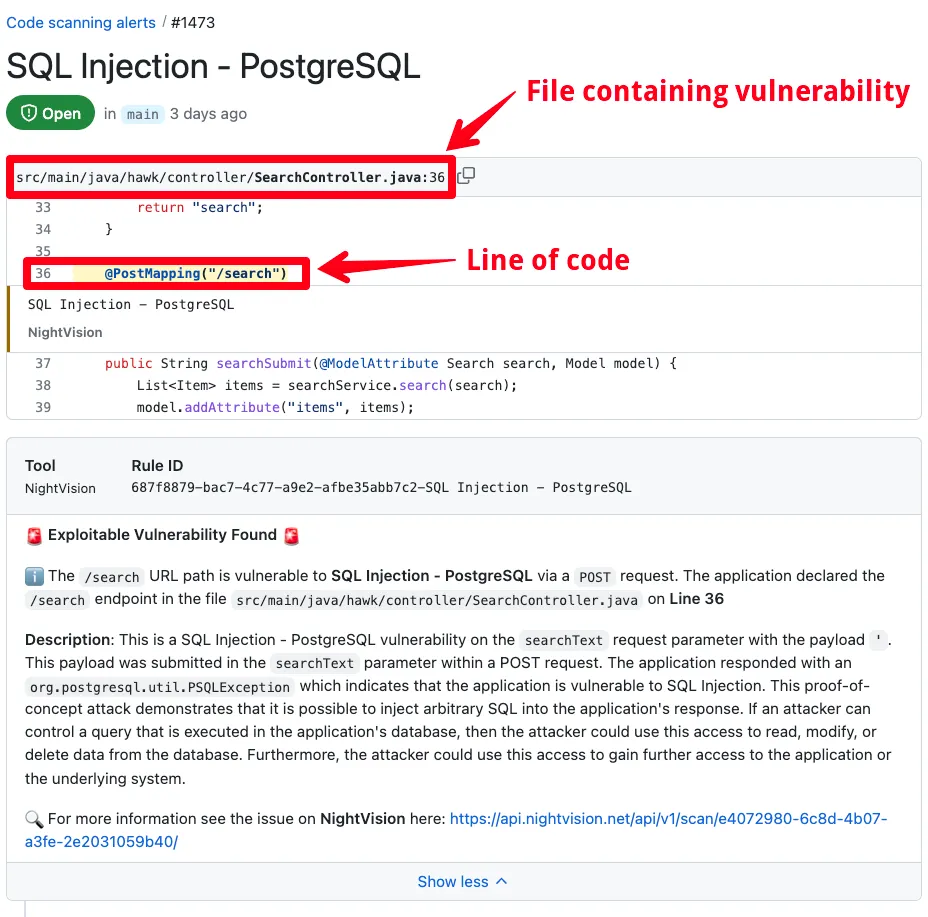
When you select one of the vulnerabilities, you can see the exact line of code where the vulnerable endpoint was defined. In the case below, the URL path /search was vulnerable to SQL Injection on a POST request.
Takeaways
Section titled “Takeaways”By adding NightVision scans in GitHub Actions, security teams can provide these benefits to development teams:
- Identify exploitable issues automatically: This gives developers a starting point from which to focus their remediation efforts - all within the CI/CD pipeline. NightVision will spin up the application and run the scan within GitHub Actions as soon as an exploitable vulnerability is introduced.
- Make security easier: The developer doesn’t need experience in penetration testing to benefit from automated security scans.
- Surface issues in the developer’s workflow: If a vulnerability is found, it will be reported to developers through GitHub Security Alerts. Every time they visit the repository, they will see it in the “Security” tab at the top of their repository:
